Reedville 2021

April 17th, 2021

Today was forecast to be pretty nice with 10-15 mph winds from the west which would swing northerly around noon. I figured I would head north from Windmill Point on a beam reach and visit Reedville which is 16 miles away. Then the wind would change and I’d have a run back to Windmill Point. I didn’t think to check the tide which I ended up fighting the whole day. I ended up going 40.7 miles in 9.25 hours. Average speed was 4.4 mph with a max of 8.1 mph.

It was so calm at the boat ramp that I launched without brailing. The improvements I made over the winter have really made rigging easier, although it still took about 35 minutes.

Heading out of the marina at 7:20 am with the faintest breeze. Someday I want to make a topsail for ghosting along. But I think that’ll have to wait until after I get camping aboard figured out.

Out into the Rappahannock and the breeze picks up, but the only waves come from a passing deadrise loaded down with crab pots.

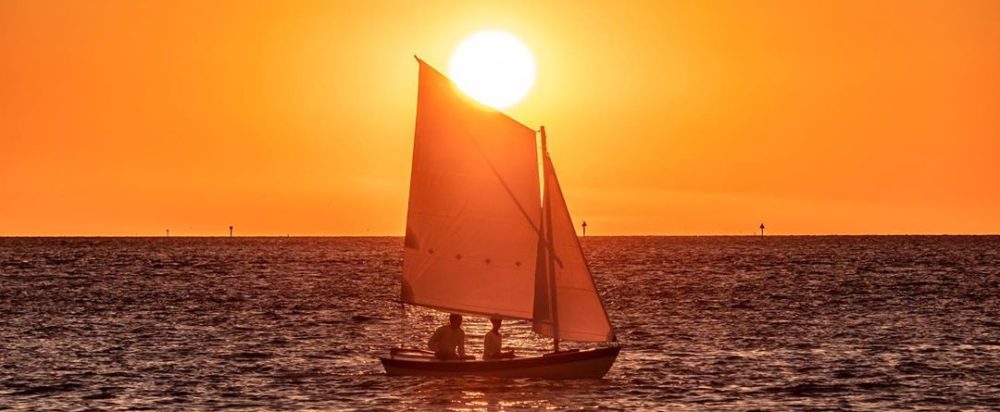
Just about at the end of Windmill Point. Straight ahead is the Eastern Shore about 20 miles away.

I made the turn at the point and headed due north on a beam reach in beautiful weather and I settled in for a pleasant day of sailing. Reedville hasn’t popped over the horizon yet, but I could see the far part of Fleet’s Bay. Somewhere along here I scared off a flock of surf scoters… they’re big fat ducks with a white patch on their forehead and back of their neck. Dad did a lot of duck hunting and he always called them skunkheads.

Alas, Mother Nature didn’t check the forecast and the wind went northerly way before it was supposed to and I had to start tacking. I was also fighting the current which I had neglected to check before leaving. At times it was a bit frustrating since the wind seemed to keep shifting, or maybe it was being influenced by the land which made it a bit difficult to know how to keep making progress. One of my tacks got cut a bit short when I came across some watermen working a trotline. At the time I thought it was a gill net and didn’t know if I’d get tangled up in it.

About 3/4 the way to Reedville I went by Dameron Marsh. This is a low lying, marshy area with relatively shallow water all around. I managed to skirt by with 50 yards to spare and it was pretty rough. The wind had picked up and the waves were short and steep.

Crossing Ingram Bay was the roughest part of the trip with lots of white caps and gusty wind. It wasn’t quite to brown pants level of wind, but there was definitely sufficient wind. Once I managed to get in the wind shadow of land it got a lot better. One of these days I really need to figure out reefing…

Heading to Cockrell’s Creek where the waves really calmed down.

My original plan had been to go to Reedville and get lunch at the Crazy Crab and then check out the wooden skipjack and buy boat at the Fishermen’s Museum. But it was already 1:30 pm so I decided to head back after checking out the smoke stack at Omega Protein.

The menhaden fleet at Omega Protein. These ships rely on spotter planes to find schools of menhaden in the Chesapeake and Atlantic. Then they drop a pair of purse boats which encircle the school with a net. The fish are vacuumed out and later rendered down for their oil at the factory. Rendering puts off a powerful smell of money and I remember getting a whiff of it as a kid 15 miles away when the wind was right. These days it’s not as bad since regulations have improved.

This is a menhaden ship from the 1940’s which carries the purse boats on davits. Modern ones have a pair of ramps at the stern to winch them out. Right now all the purse boats are stored on land beside the stack.

The Morris-Fisher stack was built in 1902 and stands 130 feet tall. A decade ago it was in real danger of falling down… a huge chunk was missing from the top, there were cracks running down the side, and bricks fell off regularly. Funds were raised and it was restored in 2011.

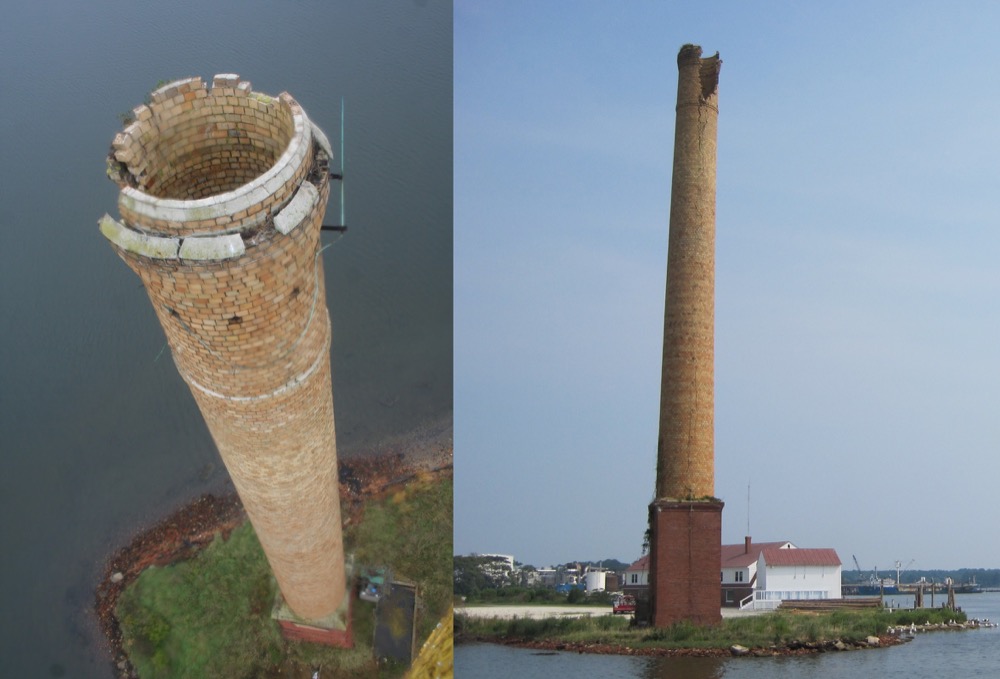
Not in very good shape! From savethestack.blogspot.com and https://www.hmdb.org.

Reedville was at one time the richest town in America. There were over a dozen fish factories along the creek and many owners and ship captains built their mansions on “Millionaire’s Row.” The red roofed building in the center is the Crazy Crab where I was going to have lunch and on the left is the ruins of a fish factory. You can just make out a few of the mansions too. One of them, “The Gables” is made from bricks used as ballast and has a mizzen mast running through the center of the house to support the roof.

Heading out of Cockrell’s Creek there are some more ruins and piling.

Back into Ingram Bay and the wind and waves started picking up. But it was great because I was on a 14 mile broad reach!

I averaged about 6.5mph which is a little slow because by now the tide had started coming in again. I mostly sat on the side deck straddling the rowing thwart. Lots of hiking and the leeward side of the boat had a constant stream of foam shooting out. The waves were probably about 2′ with an occasional bigger one. It always looks scary until the boat just slides up the face and it’s gone.

Back to the familiar waters of Windmill Point.

These guys have front row seats to all the hurricanes and nor’easters.

Wing and wing after making the turn into the Rappahannock. I’ve been thinking of building some kind of combo whisker pole/boom crutch, but I haven’t quite got it figured out yet.

I dropped the jib as I approached the entrance to the marina. Closer to the boat ramp I let the peak droop to depower the main with my new snotter led aft arrangement. Then I removed the toggling snotter block and dropped the main halyard. The sail came down easily without hanging up on the thumb cleat due to the new spiraling robands, I definitely think the winter improvements are working well.

This guy’s got a bit of work to do before summer fishing! While I was waiting for a guy to pull his boat out, he asked me how old mine was. He was pretty surprised when I said three years, he said he thought it was “an original!” I think someone has complimented Ross’s design on every outing.

So all in all I’m pretty happy with the winter improvements, although I did find a few things that need tweaking:

There’s a leak where the centerboard cap meets the rowing thwart and I spent the whole day sponging out water. I had this problem last year and I guess I didn’t put enough bedding down when I bedded the cap.

The snotter definitely needs some purchase. I think the peak pennant is stretching because I had a terrible time keeping a diagonal crease out of the mainsail. Might need some better line, or maybe the snotter purchase will fix it.

The toggling snotter block is a vast improvement to my cow hitched version, but I think removing the thumb cleat and adding a mast traveller will be better. I’m not sure if I want to attach it on a line to the main halyard, or run its own dedicated halyard. Either way it needs to be easily removable so I can put it on the mast while it’s stepped.

The side benches are ok, although not quite as comfortable as sitting on the sole and leaning against the side deck. Points for keeping my butt dry, but my head did get knocked by the boom more often.

My radio runs out of battery after 8 hours. I’ll try to remember to keep any emergencies within that timeframe.

Will I ever be able to go sailing without finding something new to fix?! Maybe on the next trip.

Camping ideas

The last improvement to the boat was the addition of a turning block for the boom downhaul. Previously I’ve just been using the tail of the main halyard to pull the boom down, but I’ve been a bit wary of doing it that way since it could increase the time to get the sail down in a hurry. So today I drilled a hole through the base of the mast, chamfered the edges well, and attached a low friction ring in a loop of line. We’ll see if I need to add any purchase or not.

With the sailing stuff pretty much finished, I’ve been thinking of some sort of tent. I’d like to use the sprit as a ridge pole with a crutch on the transom. I think having the tent low at the bow might be a good idea to try and get the boat to weathercock into the wind too. I’ll probably make a prototype out of polytarp and carpet tape and just clamp the crutch onto the motor well for the first few outings until I can get a better idea of how it needs to work.

Possibly the tent could be used in this position too in calm conditions.

Mill Creek 2021

April 6th, 2021

First sail of the year after a ton of improvements and repairs over the winter. I’m happy to report everything worked well, although there is still room for improvement. Today my wife and I took the boat out from the public ramp at Mill Creek. I’d originally intended to head out upwind into the Rappahannock but there was some chop that threw spray over the bow. My wife was getting wet and cold, so I decided to head for Mill Creek itself so it would be sheltered.

The ramp is pretty good with lots of room to get turned around, but there’s one issue that doesn’t show up on Google Maps. That pile of sand being held back by the jetty has a tendency to silt up the entrance to the ramp. Sometimes it’s hard to remember that the world isn’t as unchanging as satellite pictures portray.

This was high tide and there was only a ~10′ wide opening between the dock and wooden wall to the sand. Pretty doubtful anything much bigger than my boat could get through. There were signs saying there’s only a foot of water at low tide too.

The toggling robands make rigging the boat faster than last year, but there’s still a lot of fiddly stuff that I’d like to improve. This was also the windiest place I’ve ever set the boat up at, although it all worked ok.

Inserting the toggling snotter turning block between the right robands. This is a vast improvement over the cow hitched version I’ve been using, but I think a mast traveler and a dedicated halyard is the way to go. Also the peak pennant is a good upgrade. The only downside is it’s pretty long.

Cleating off the peak pennant. I then coil up the excess and tuck it between the sprit and pennant. That seemed to hold it pretty well, although today wasn’t particularly rough sailing either. Tensioning the snotter will push the peak up and take out that diagonal crease, but it’s better to have the snotter loose before brailing.

Next I brailed up the sail. This is the probably the biggest issue after the improvements outlined above. I found it hard to get the sprit and peak pennant between the brail line and sail without losing the tail of the brail up to the throat. A longer line would help so I could get enough slack to thread everything through.

And we’re off! Heading into the Rappahannock was a bit choppy and my wife was getting hit by spray, so I made a 180º to explore Mill Creek. The side benches are a new addition. They aren’t as comfortable as sitting on the sole, but it is quite a bit drier.

Heading into Mill Creek.

Looking back at the entrance. This would be a good opportunity to test out sailing in flukey winds.

Sailing wing and wing. Here you can see the spiral toggling robands and how the excess peak pennant is coiled up and secured. I haven’t run the boom downhaul aft yet, but once I do I’ll have an unused belaying pin for a snotter traveler halyard.

Looking up to the head. I’ve always seemed to have trouble with the brail line pulling in the leech. The weight of the line coming down the mast is more than from the throat to the grommet, and the sprit pressing on it doesn’t help. I think a snotter traveler might make the brail line obsolete which would be nice.

There are a lot of boat houses on this creek which give it a certain kind of charm.

This is my wife’s kind of sailing. I don’t think she’ll be taking up sail and oar cruising.

Heading back towards the entrance. It took 36 tacks to get back to the ramp.

Heading back. I’m making a new tiller extension swivel from 316 stainless which is why the extension isn’t installed.

Towards the end the rudder started plowing through the mud which wasn’t too bad, but it hit something solid enough to pop the quick release clam cleat. This is the first time that’s happened and I was beginning to wonder if the rudder would have enough leverage to pop it loose. We had to tack for quite a ways with the centerboard held down by hand as it was so shallow.

When I looked at the GPS track I noticed the tacks towards the mouth of the creek had this scalloped look to them. I think what happened is I’d try to point too high after tacking and then I’d fall off some to get the speed up. Then I’d start pointing up again and lose speed.

Anyway, that was my first outing this year! I went 3.5 miles in about an hour. Average speed was 3.5mph and the max was 7.5mph. A pretty short trip, but I got some good data on sailing in narrow protected creeks and now I know my improvements are all working well.


Rigged!

Today was calm so I decided to try out my improvements with a test rigging. I’m pleased to say everything is working great! I’ve made toggle robands for the mainsail, a long pennant for the peak which runs down the sprit to a cleat by the heel, the snotter tension leads aft, there’s a toggling snotter arrangement, and a few other various time saving measures.

All rigged! I hope I can get out on the water soon.

My original snotter was a little too complex for its own good. It was all one piece and cow hitched around the mast, which was good for minimizing the number of lines needed but it was super awkward to rig and unrig. So I decided I’d make something with a toggle to make it easier, and a separate snotter line that stays attached to the sprit. I’ll cut the tail off once I’m sure this version is working, and I might add another seizing below the loop and a third above.

Here you can see the snotter running from the heel of the sprit up to the low friction ring on the toggle arrangement and back down the mast to the mast parter where it turns aft to a cleat on the centerboard case. I’ve also addd a long line to the main’s peak which runs down the sprit to a cleat near the heel. I originally had the cleat on the other side of the leather, but it was too high to be convenient.

Here’s the snotter running through a beehole in the mast partner back to a cleat on the centerboard case. I got rid of the mechanical advantage I had last year, but this still seems to work ok. It’s pretty close to the limit friction wise though so I’ll have to try it out on the water to make sure. The other cleat is for a boom downhaul which I haven’t fully decided how to run yet.

Random Improvements

I’ve been working along on all the stuff that needs to be fixed or improved, so this post will be a hodgepodge of random stuff.

Ross recommended making a bracket that bolts onto the centerboard and projects up through the centerboard trunk cap. Then a stainless rod attaches to that to allow you to raise and lower the centerboard. The bracket seemed like a lot of work, so I just drilled a hole and whittled out a section for the thickness of the rod. The hole is encased with thickened epoxy to provide a hard surface and the rod is bent in such a way that it lays flat along the cap when the board is in the up position.

Here’s how the rod sits when the board is up.

As I mentioned in my last post, the wiring on my trailer had quit working so I decided to permanently fix it. I bought 25′ of 7 strand 14ga trailer wire so I could run individual ground wires to the lights. I’m not going to use the trailer as a ground again, too much corrosion. The purple wire is the second brown wire to the brake lights, and the blue wire is the second ground. The red wire isn’t needed at all. I wired everything up with solder heat shrink fittings, which seem to work really well. These things have a little blob of low temperature solder in the middle that melts with a heat gun. After testing to make sure it was wired correctly, I wrapped everything in a few layers of electrical tape. Probably not as good as amalgamating tape, but I didn’t have any.

I originally built wooden rudder cheeks, but somehow they ended up too tight for the rudder. I was about to go on vacation and needed something, so I welded one up out of aluminum. I didn’t have time to paint it, so I’ve been sailing around with it bare for two years. I finally decided to have my buddy powder coat it the same green as the mast partner, but it outgassed quite a bit during the baking. Part of the problem was galvanic corrosion between the stainless gudgeon and pintles, so I cut some insulators out of a milk jug. Might not be necessary with the powder coating, but it can’t hurt.

The notch in my new mast partner ended up just a hair smaller than the original, so I needed to thin down my leather padding. I sharpened a little thumb plane razor sharp and it worked surprisingly well. Leather seems to have a grain to it since it would dig in one direction, but cut beautifully in the opposite. I took the leather down to about half its original thickness.

Added a small cleat to the sprit which will hold a line running through a bee hole from the peak of the sail. I figure this will make rigging easier, rather than trying to catch the peak in a notch on the end of the sprit.

Through a convoluted story, I ended up with this little outboard. It’s a Honda BF2A that looks to be in pretty good shape. It seems to make decent compression and everything turns freely. The only catch is that it’s missing about $300 in parts. It needs a carburetor, gas tank, air guide, and throttle linkage. I’m currently trying to decide if it’s worth fixing up, especially since I don’t know that it’ll run. I would really like to replace my British Seagull with this since it’s a 4 stroke, even though I don’t really run the Seagull enough to worry about the crazy oil ratio.

Trailer Maintenance

I’ve been working on the trailer while the boat was hanging in my shop. I built a platform to support the keel and keep the trailer from scraping the paint off when I launch. I also lowered the side bunks and moved them ahead a bit. After the platform was built, I took the wheels off to repack the bearings and change the dust covers for some Bearing Buddies.

I’m glad I did because I was greeted to a handful of rollers spilling out of the hub when I took the wheel off. This trailer is pretty old and I don’t think the bearings have ever been replaced. Anyway, I bought some new A-4 bearings, packed them, and got the wheels installed again.

Next I stapled some bunk carpet to the new platform. There’s a wooden block that supports the keel’s rocker up forward under the carpet. I added a jack too, so I don’t have to move the trailer with a dolly or the winch handle. The red bow stop is new as well, the previous one was a black rubber roller that left black marks on the bow. Hopefully this one doesn’t make my boat look like I ran over a scuba diver.

And finally I got the boat back on the trailer. I’ve bedded all the fittings that go on the deck which was a job. You don’t think it should take that long to bolt stuff down but it does. It didn’t help that I had to remake the backing plates because I put the originals somewhere for safe keeping… I still need to clean and paint the inside of the boat before I can put the inspection hatches in.

And of course no project would be complete without uncovering more problems than you started with. The trailer lights have quit working, even though they’re only a year old. They’re LED and I always unplug them before backing into the water, so I think there’s a corroded connection somewhere. I’m getting 1.5 volts measuring between the trailer ground and the plug. There’s a complete circuit but I guess there must be too much resistance somewhere for the lights to work. Anyway, I’m thinking about running a dedicated ground line to each light and changing the wire nuts to those heat shrink butt connectors. Either that or make some clamp on lights and remove them when going into the water. Whatever I do, I don’t want wiring the trailer to become a yearly thing!

Odds and Ends

When I built the boat I didn’t take the time to over drill fastener holes and then fill with thickened epoxy. So as I have been epoxying things I’ve started working on the holes. I also shortened the oarlock pads since the bolts didn’t actually land in the doubler underneath the deck. That was a measurement error on my part in the rush to get the boat ready for a vacation. Here’s how to enlarge an existing hole with a Forstner bit.

I’ve never been happy with the slot in the end of the sprit that catches a loop of line in the sail’s peak. So I filled it with a block of wood which I’ll smooth down and then drill a bee hole though. I’m planning to have a long length of line tied into the peak which will go through the bee hole and down the sprit to a cleat. That should make it easier to get the sail rigged.

The hard rubber rollers on my trailer have started chewing up the edges of the keel, so I hoisted the boat off the trailer with a chain fall so I could get under there to sand and epoxy. A strap around the main thwart almost perfectly balances the boat, and a line to the bow fitting keeps it from nosing down. I’ve also started painting the bare spots to build them up a bit before I paint everything else.

I’m hoping to have the boat done by the end of the month. Hopefully everything will go well and I’ll be sailing soon.

Mast Partner Progress

I got my aluminum mast partner back from the powder coater recently and dry fit it to the boat. I’m using four 1/2″ bolts to hold it on, so I drilled some 9/16″ holes in the bulkhead and sealed the wood with epoxy. Hopefully I can start painting and reinstall the fittings soon.

First of three rounds of epoxy to seal the bare wood and inside of the holes.

Testing the mast partner

I did have a bit of a disaster before I could dry fit it… I managed to get a bolt stuck in some left over powder coating down in the threaded hole. So I drilled it out with a left hand drill bit, picked out the threads, and then chased the threads with a tap.

Milling the bolt down flat so I can have a good starting point for the drill. You can use calipers to find the center point, but I usually just eyeball it. With a small diameter spotting drill you can get within .010″ without too much trouble.

Sometimes the stub of bolt will come out if you drill aggressively with a left hand bit.

All’s well that ends well.

Side Bench Improvements

We’ve had a few days of decently warm weather lately so I’ve been able to make some progress on the epoxy work. I’ve added oak ledgers to the thwarts to carry some side benches, overdrilled and filled the fitting holes with thickened epoxy, faired out the area for the mast partner, and added a doubler to the centerboard case to carry a pair of cleats for the downhaul and snotter lines.

The ledger on the forward face of the sternsheets had to be split in half to clear the flange on the inspection hatch. I’ve temporarily screwed it on with deck screws while the epoxy cures, but I’ll later remove them and fill the holes. I tried to give everything a smooth shape so hopefully it won’t be too hard on the back if I rest against them.

Looking forward, this one is fastened so it is flush on the bottom with the thwart. I’ve placed them so a 3/4″ board will make a flush sleeping platform.

Here’s the plywood doubler that will take the downhaul and snotter cleats. I’ve also smoothed out the area for the mast partner with a skim coat of thickened epoxy.

Here’s the updated todo list:

  • Rebed all the fittings
  • Install the mast partner
  • Make side benches
  • Paint everything
  • The keel is getting a little chewed up from the trailer rollers
  • Build a flat bed on the trailer so the keel is supported better
  • Repack the trailer bearings
  • Possibly lower the spring weight on the trailer.

Winter Maintenance

Spring is coming so it’s high time to get the boat ready. I’ve built a new mast partner out of aluminum which is currently off being powder coated coated green. You can see more pictures of building it here.

I’ve also repaired the splits in the mast which happened at the same time my mast partner cracked. I kerfed the problem areas with an oscillating saw, saturated the gap with neat epoxy, and then troweled in thickened epoxy until it was full. While I was at it I got the mast closer to round and shortened the snotter cleat to a minimum.

And finally I’ve been busy varnishing. It’s too cold out in the garage so I took over the living room while my wife is out of town. I put 8 coats on the mast and 2 on everything else since the varnish was in pretty good shape. Don’t mind that half finished breakfast nook in the background that my wife wants!

There’s still quite a bit to do on the hull, but I need to have warmer weather to do some epoxying and painting. I need to:

  • Over drill all the fitting holes and fill with epoxy before redrilling for the fasteners
  • Rebed all the fittings
  • Install the mast partner
  • Epoxy a pad on the centerboard case for a snotter cleat
  • Epoxy ledgers to the thwarts for side benches
  • Make side benches
  • Paint everything
  • The keel is getting a little chewed up from the trailer rollers
  • Build a flat bed on the trailer so the keel is supported better
  • Repack the trailer bearings
  • Possibly lower the spring weight on the trailer.

A lot to do!