It’s been a while since I’ve had much to post. December was super busy hauling boats out so not much got done. Since then I’ve been working on a lot of smaller jobs on my boat but not really completing much of anything. Plus we have a varnish job in the shop which has put a bit of a crimp on how much dust I can make at times. But I have been doing lots of epoxying and filleting under the two side seats so hopefully soon I can paint them and glue the lids on. I’ve also been working on the ballast tank plumbing and electrical glands and conduit.
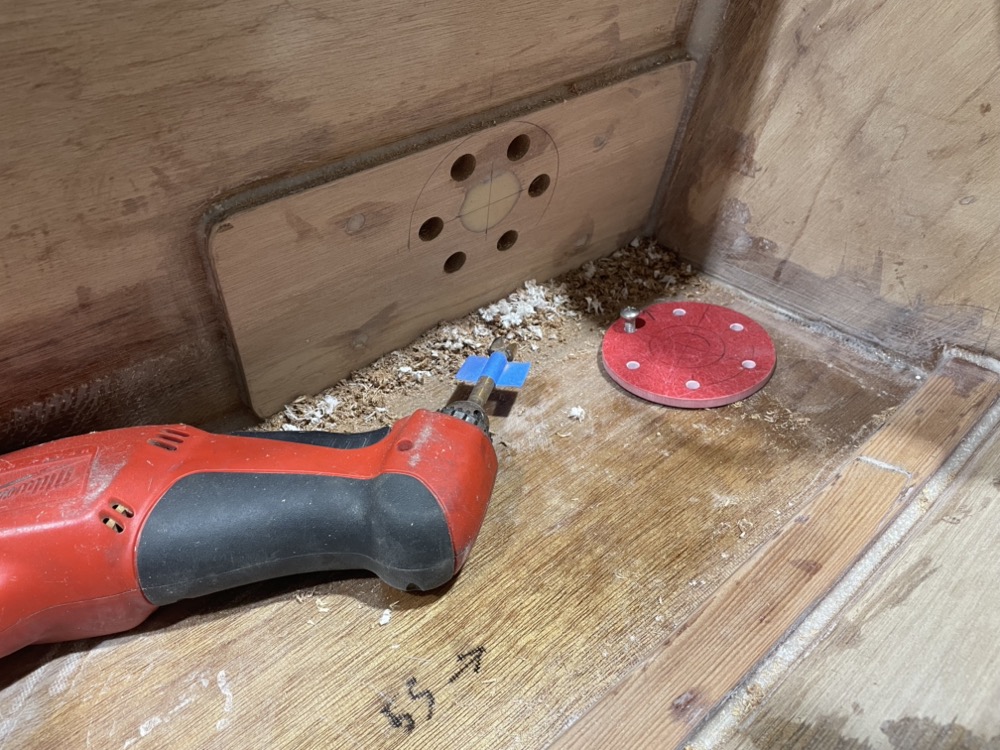
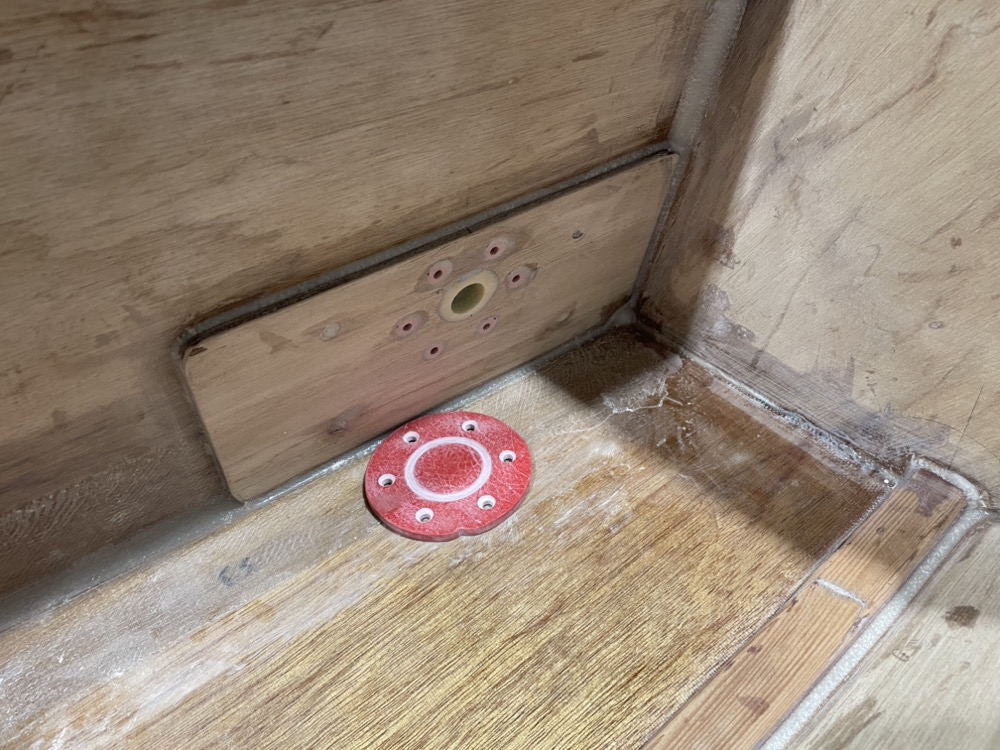
One job I’ve completed is the off-centerboard pin. The trunk makes up the starboard side seat front so it’s out of the way for sleeping on the centerline. The pin is below the waterline and inaccessible on one side and awkward to get to on the other, so I’m trying to pay particular attention to make it watertight and rot proof. The inboard side has a plywood cap epoxied on inside the ballast tank while the outboard side has a removable cover so the pin can be removed. I made the cover from 1/4″ fiberglass. The spot for the pin itself is epoxy thickened with 404.
I could have drilled and tapped the oversize holes, but it would be difficult to do and I likely wouldn’t have drilled the holes perfectly straight. So I made some fiberglass threaded bushings, screwed them to the cover plate, and glued them in. I covered the plate and plywood with packing tape so I’d be able to get them off again.
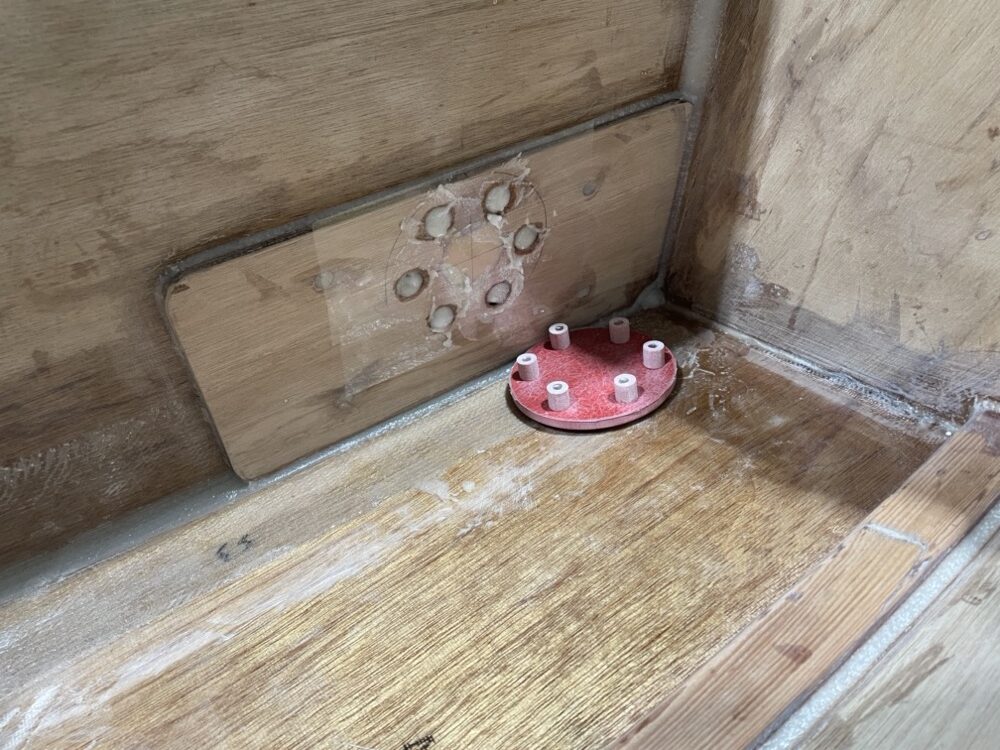
Then I glued it in place. The bushings were about 1/16″ long so after it cured I removed the cover plate and sanded everything down flush.
Next I put the cover plate in my lathe and turned a groove for the 4200 to form a bit of a gasket. I also heavily countersunk the holes so they’d have plenty of sealant too. A notch at the 12 o’clock position provides an alignment reference, although I laid the holes out pretty accurately so it might fit in any orientation.
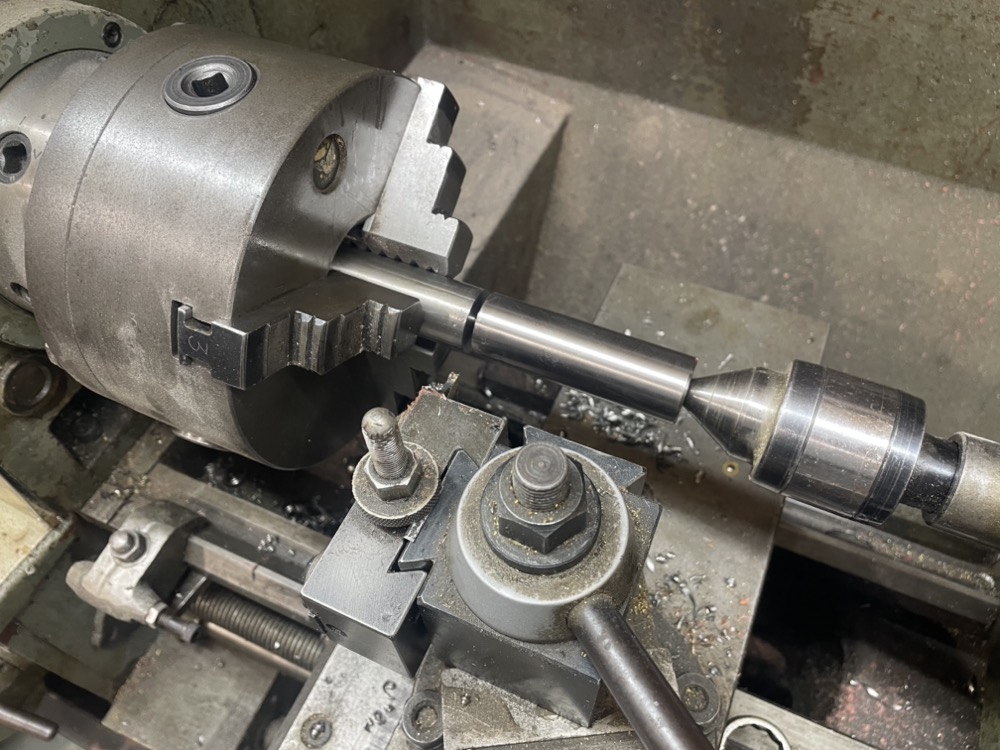
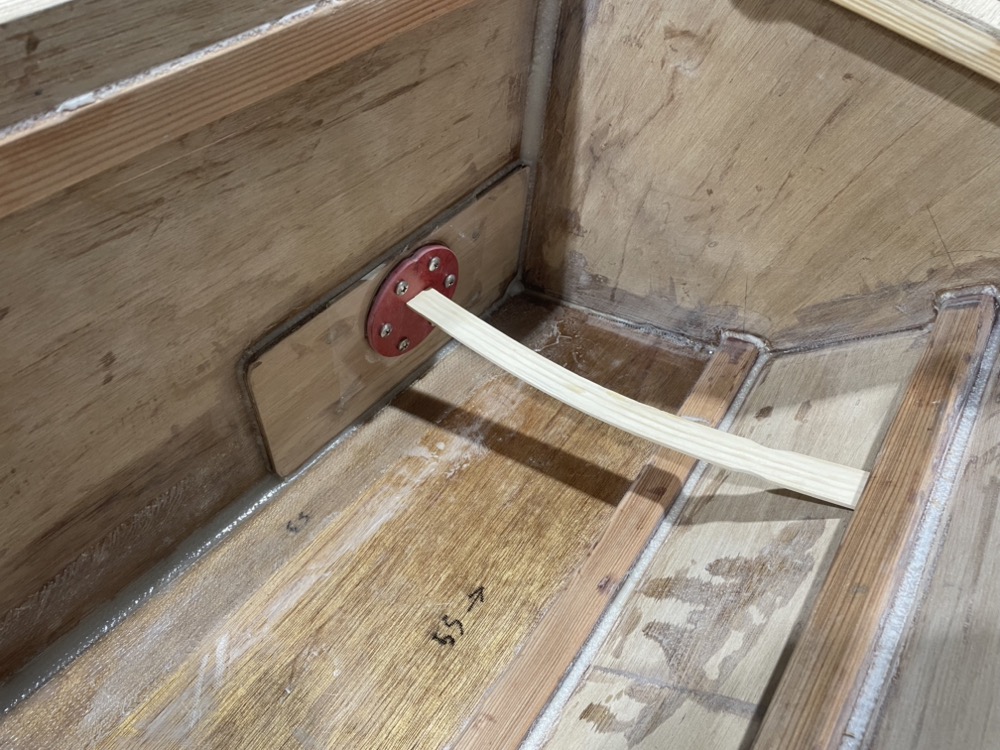
Next I needed a centerboard pin. I’ve had a 1″ diameter bar of titanium floating around after I machined my wife’s engagement and our wedding rings from it. I haven’t thought of anything better to do with it in nearly a decade so I made the pin out of what was left. I don’t recommend parting with the tailstock, but I forgot to take a picture until after I’d already cut it off. So I just stuck it back in place for the photo.
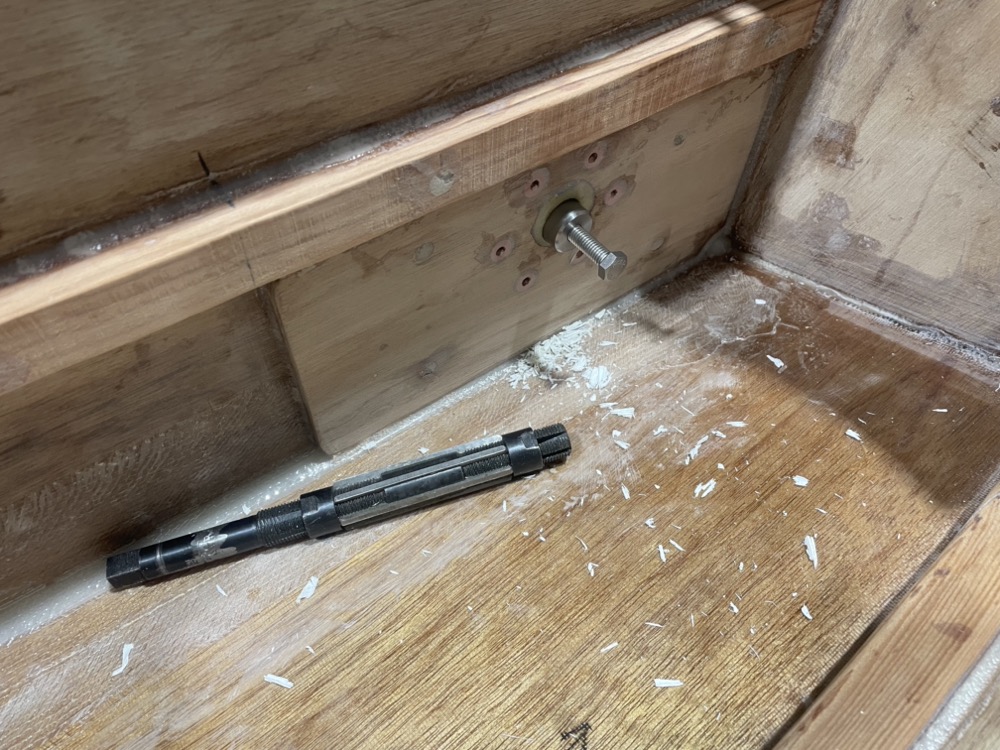
Next I drilled a 15/16″ hole and reamed it out to accept the pin with an adjustable reamer. There’s a 3/8-16 hole so I can get a bolt on it to pull it out when I need to remove the board. The starboard seat insides are finally done and ready for epoxy and paint, and the port side is not far behind.