

My focus has been on getting the inside of the side seats finished up so I can paint them and get the lids glued on. On the areas that shouldn’t see much water or wear I’m doing a 5% denatured alcohol thinned coat of epoxy and then a second full strength coat once the first tacks up. The paint I’m using is Pettit EZ-Poxy. I’ve been debating what to use ever since I started the build… The main contenders were Awlgrip (expensive and involved to touch up), Awlcraft 3000 (spray only), Alexseal (as expensive as Awlgrip plus I’ve never used it), Toplac Plus (not impressed with it), Kirby’s/Rustoleum (softer and needs to be touched up more frequently). My work buddy and I built a winterizing dock cart two years ago and we slapped a coat of EZ-Poxy on it with little prep work and it’s really held up well.
The first thing I painted was a mounting board to test the paint. It brushes on kind of streaky but quickly smooths out. Two coats turned out pretty good although I might add a third in the more trafficked areas of the boat. What’s this contraption you ask?!
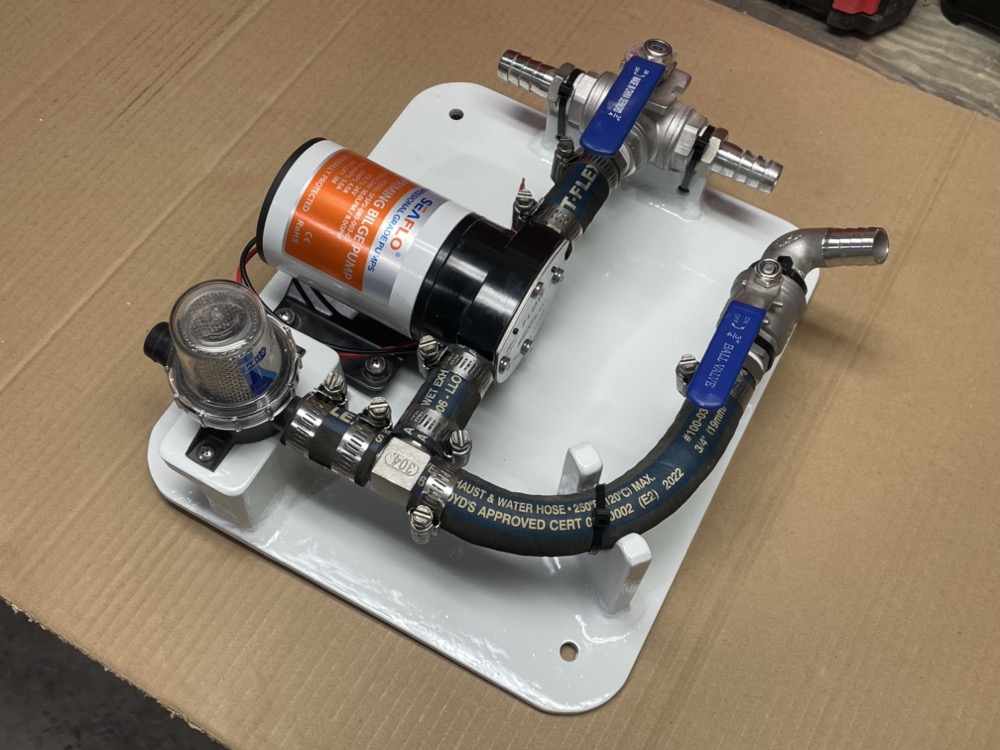
My boat’s plumbing system! With a reversible pump and valves in various positions I can pump seawater into the ballast tank, pump the ballast tank overboard, act as a bilge pump with a plug in float switch and hose, or as a rudimentary wash down hose.
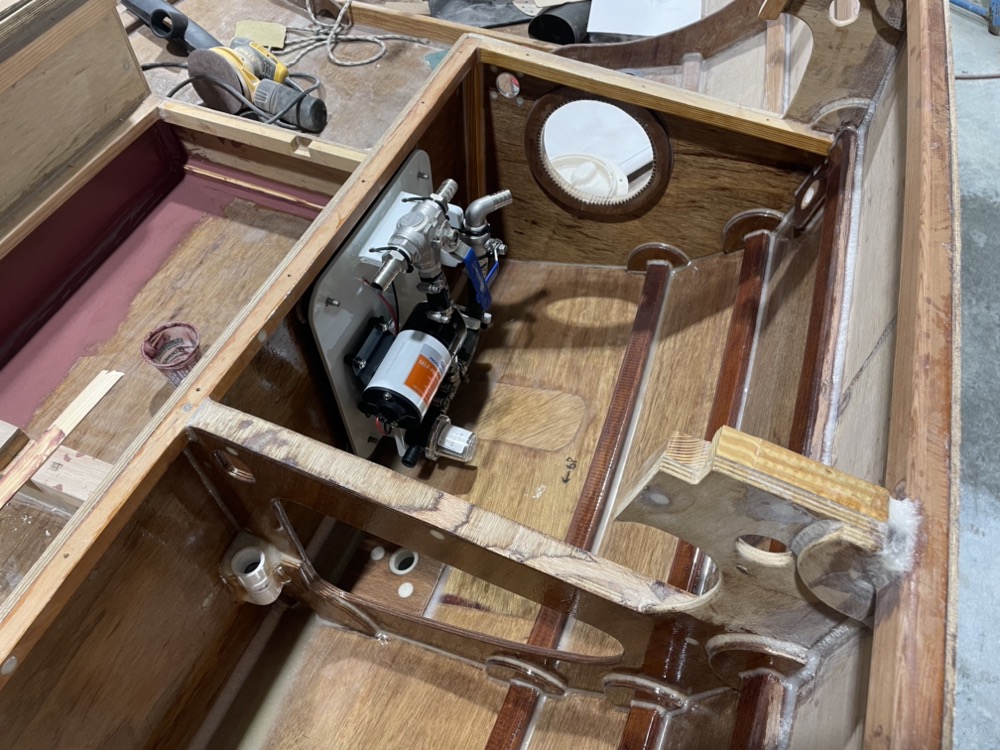
A flanged seacock mounts to the backing plate on the garboard and leads into the strainer. A hose will go through the frame to the PVC pipe and into the ballast tank. Another hose will go to a through hull on the side of the boat for discharge. And a fourth hose will go through the bulkhead beside the inspection hatch to a male cam lock fitting welded to a mounting plate. That will let me attach a bilge pump hose or a wash down hose with female cam lock ends. I haven’t started the electrical side of things yet, but it doesn’t seem too hard. The whole setup is mounted to the board and will fit through the seat hatch once I remove the hoses. There’s enough room to get to the strainer cap and the impeller’s cover plate, although it wont be super easy.
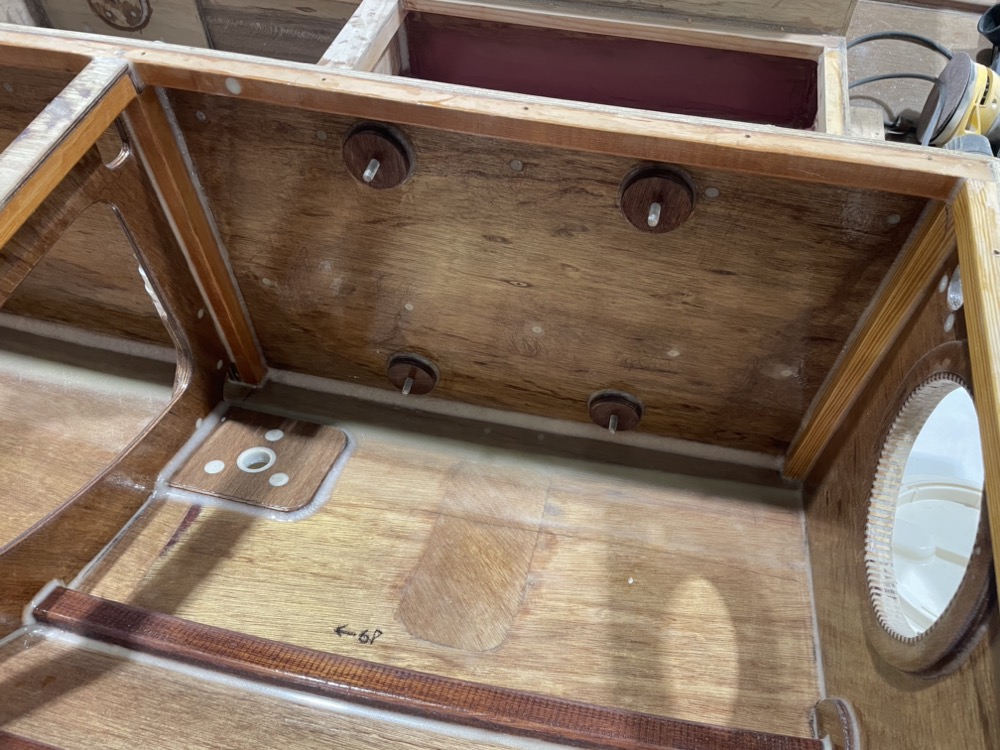
The mounting board attaches to these 3/8″ bolts epoxied into 1/2″ standoffs so the heads of the fasteners don’t dig into the back of the seat front. This plumbing project is totally overkill for the boat, but it has been a lot of fun to design.
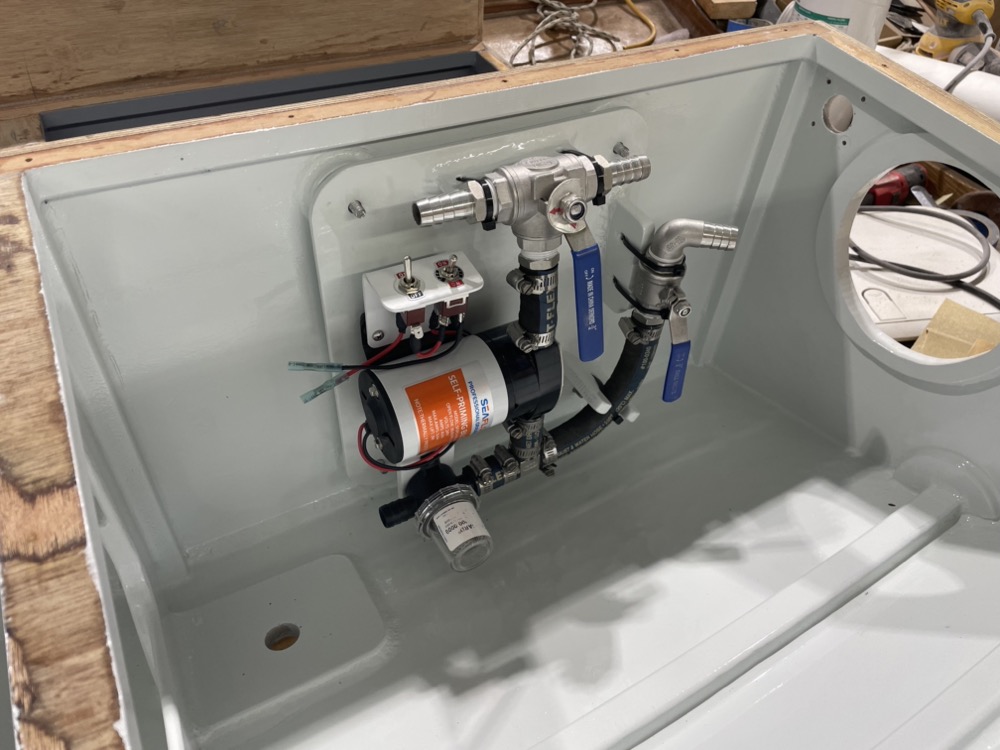
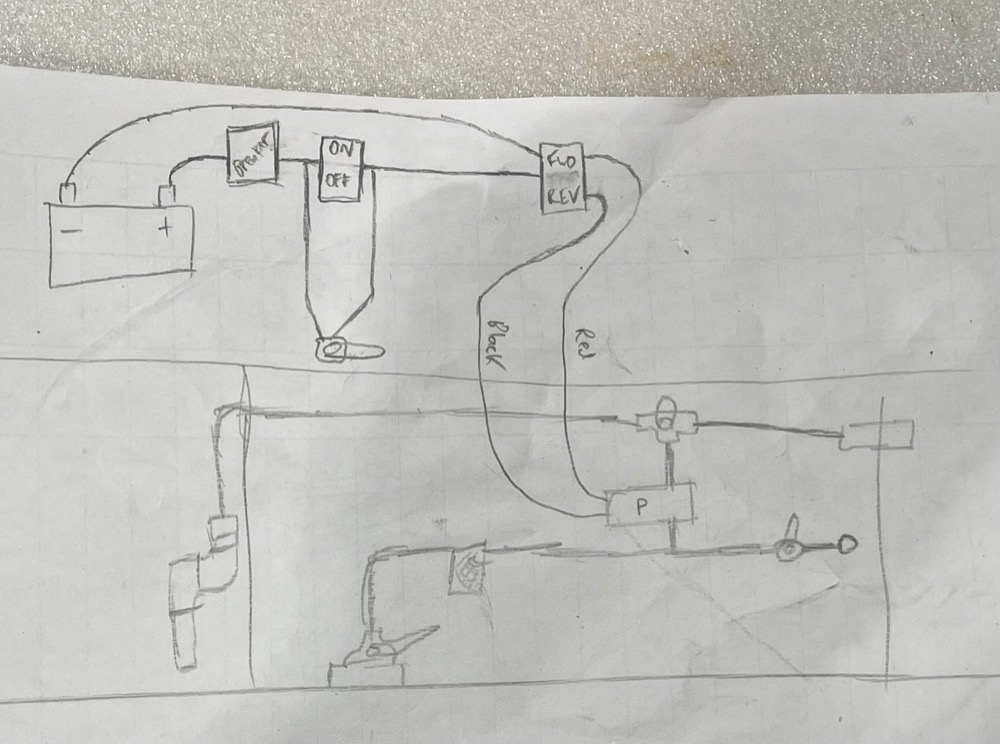
I bent a piece of 1/8″ aluminum into an L shape and mounted a pair of toggle switches to the top. The first one has spades to wire a bilge pump float switch in parallel while the second switch is the reversing switch for the pump.
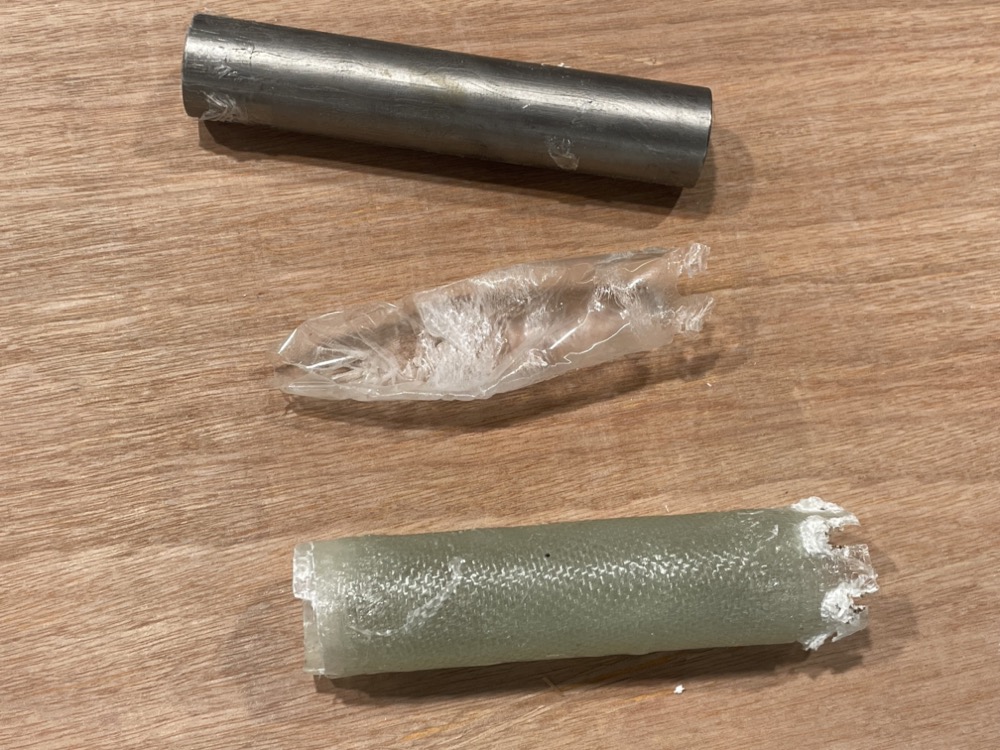
For a while I’ve been using extra epoxy and scrap fiberglass to make a fiberglass tube. I wrapped packing tape around a piece of 1″ round bar and sprayed it with Pam cooking spray. Then I built up about 1/8″ wall thickness from 6oz cloth.
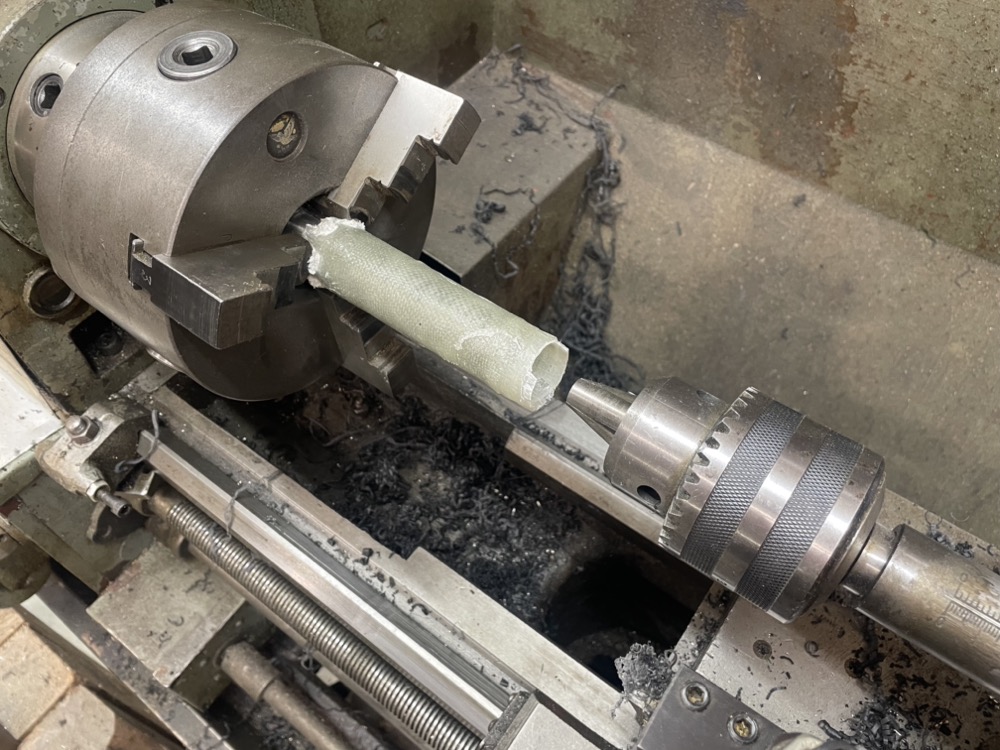
To get it off I lightly held the bar in my lathe and used the tailstock to press the tube off. The surface finish inside was incredibly smooth. All those shavings were from making a new bushing for the halyard swivel in an in mast furler the other day.
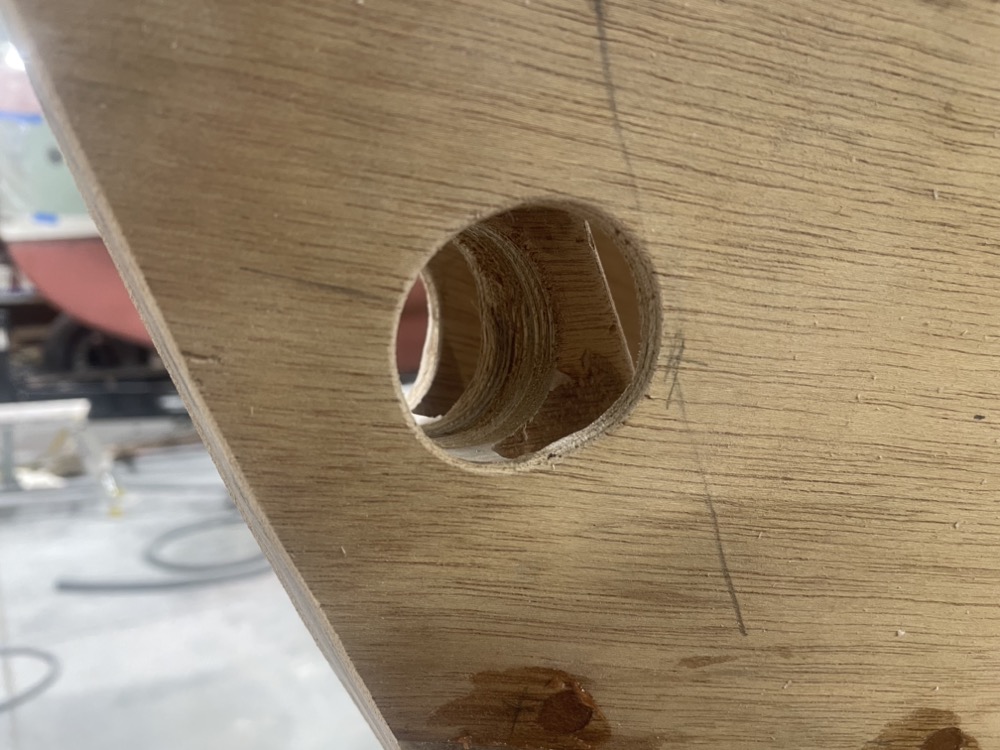
Then I drilled a hole up in the bow. It’s positioned towards the back of the stem.
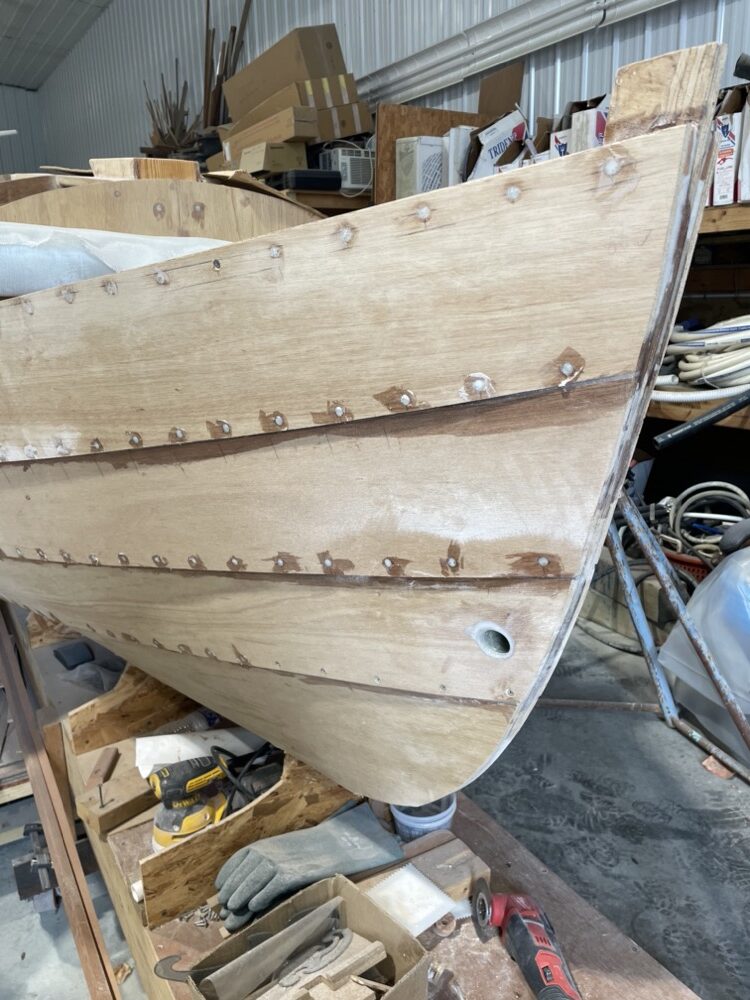
I really like Mo ‘Poxy’s idea of a soft shackle through a hole in the stem for the painter. I did it on my 15’ First Mate and haven’t had any issues. There’s no fitting to pull out or channel water into the wood via fasteners. It’s probably stronger than a fitting, if it rips out you’ve got bigger problems to worry about. And there’s an option of using it for the bobstay on a future sail plan idea I’ve got that requires a bowsprit.
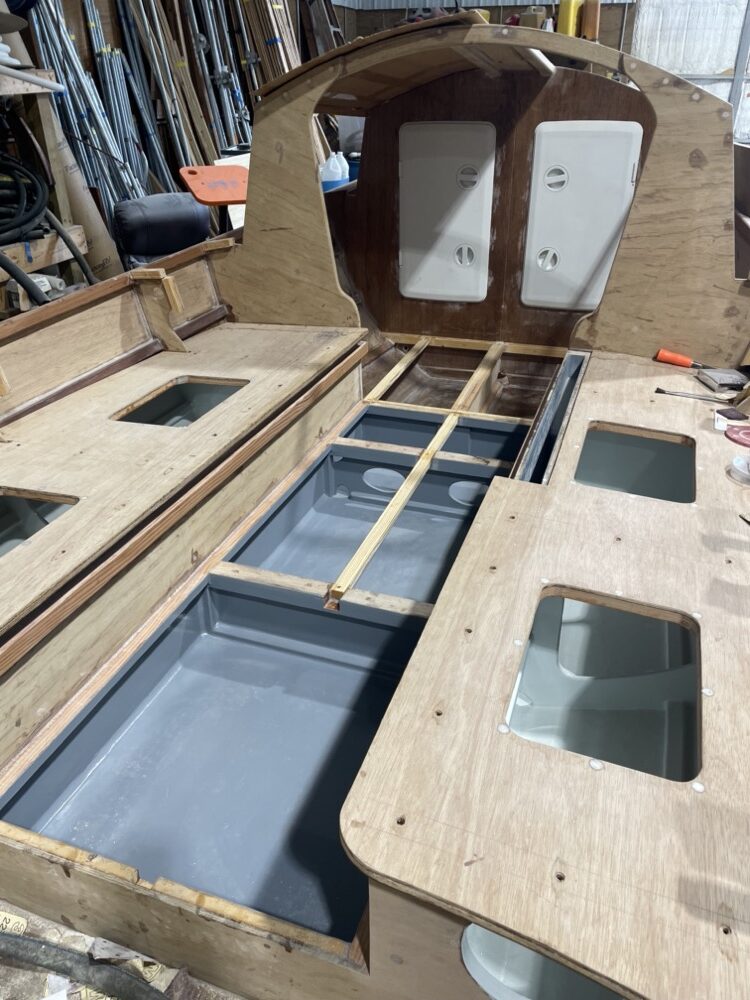
I’ve also added the supports for the raised sole and coated the footwell and ballast tank areas. I did a coat of epoxy followed by two coats of Pettit Protect. The nice thing about the barrier coat is that it doesn’t need to be sanded to recoat within 60 days. I’m really trying to minimize sanding since it takes up so much time.
I’ve also coated the underside of the seat tops and the cuddy cabin floor with three coats of epoxy. They won’t be exposed to UV so I’m inclined to just leave them bare. I’m considering tinting the epoxy white inside the forward and aft compartments just to brighten things up and leave a surface that’s easy to epoxy to in the future if I want to add brackets or whatever.
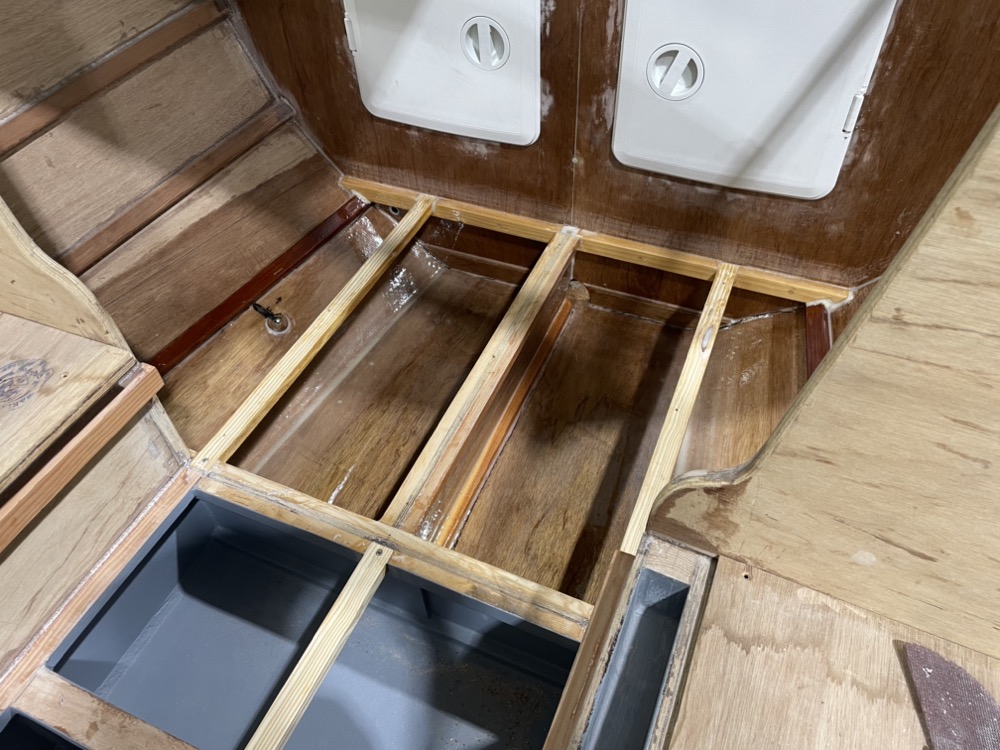
Next I got the floor under the cuddy cabin installed. Underneath on the port side I have two 3/8″ cable glands through the bulkheads for the power wire to my pump setup. The glands have pipe threads so I drilled a large hole, filled with 404 and then used a pipe tap to cut the threads. In the middle of the span is a plywood “weld mount” with a wall mount zip tie to support the cable. I make these when I have extra ply and epoxy and it’s just the plug from a 1-1/4″ hole saw with a 1/2″ hole in the middle filled with 404 and tapped 10-24. There’s enough room to get in there with a right angle screwdriver and change the zip tie if I ever need to, but best to get it positioned now.
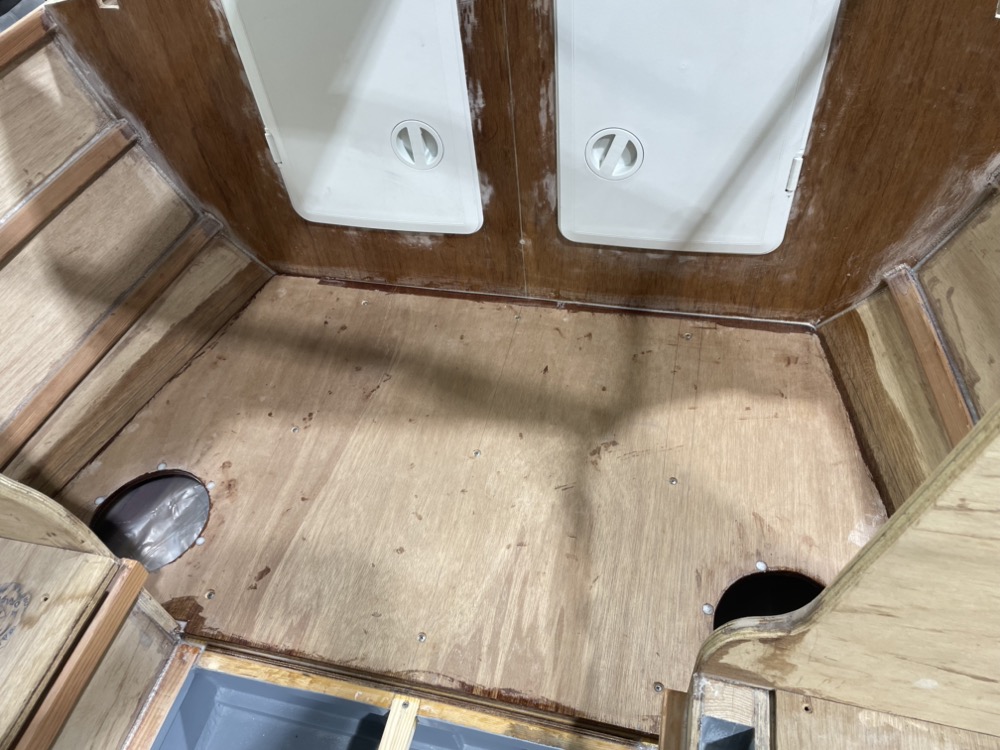
Then I got the 1/2″ floor installed. I arranged plastic sheeting underneath to catch any drips and I reached in as far as I could to smear the squeeze out into something approximating a fillet instead of a bunch of stalactites waiting to cut my hand open years from now. One this cures I’m going to come back and make some nice fillets all around from 407 to aid wiping the floor out.