Random Improvements

I’ve been working along on all the stuff that needs to be fixed or improved, so this post will be a hodgepodge of random stuff.

Ross recommended making a bracket that bolts onto the centerboard and projects up through the centerboard trunk cap. Then a stainless rod attaches to that to allow you to raise and lower the centerboard. The bracket seemed like a lot of work, so I just drilled a hole and whittled out a section for the thickness of the rod. The hole is encased with thickened epoxy to provide a hard surface and the rod is bent in such a way that it lays flat along the cap when the board is in the up position.

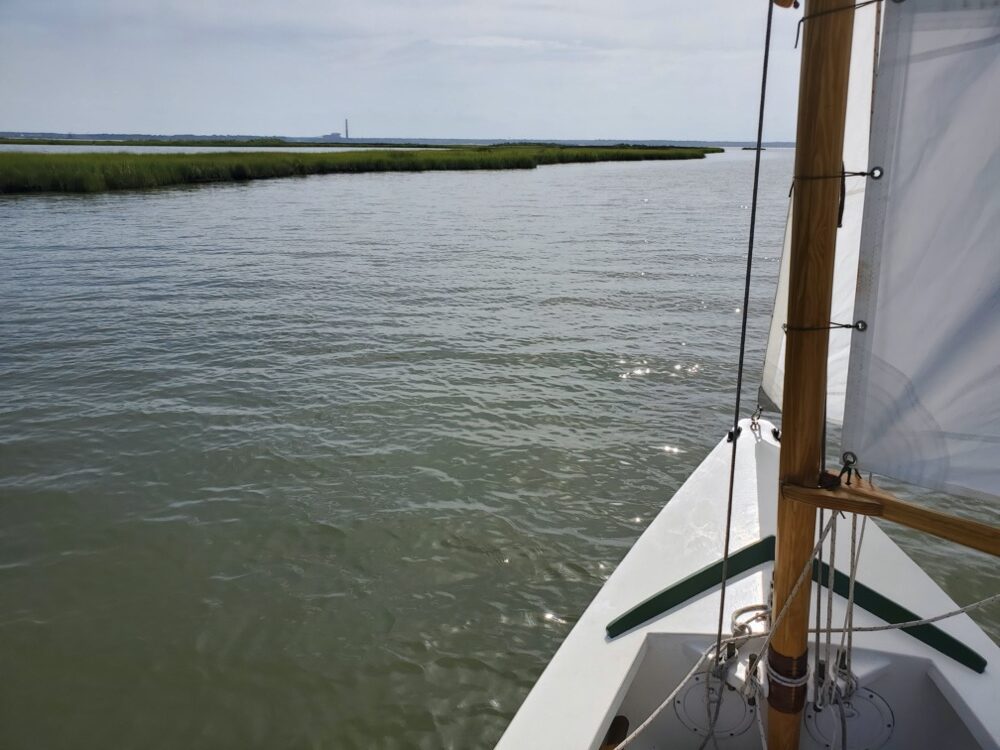
Here’s how the rod sits when the board is up.

As I mentioned in my last post, the wiring on my trailer had quit working so I decided to permanently fix it. I bought 25′ of 7 strand 14ga trailer wire so I could run individual ground wires to the lights. I’m not going to use the trailer as a ground again, too much corrosion. The purple wire is the second brown wire to the brake lights, and the blue wire is the second ground. The red wire isn’t needed at all. I wired everything up with solder heat shrink fittings, which seem to work really well. These things have a little blob of low temperature solder in the middle that melts with a heat gun. After testing to make sure it was wired correctly, I wrapped everything in a few layers of electrical tape. Probably not as good as amalgamating tape, but I didn’t have any.

I originally built wooden rudder cheeks, but somehow they ended up too tight for the rudder. I was about to go on vacation and needed something, so I welded one up out of aluminum. I didn’t have time to paint it, so I’ve been sailing around with it bare for two years. I finally decided to have my buddy powder coat it the same green as the mast partner, but it outgassed quite a bit during the baking. Part of the problem was galvanic corrosion between the stainless gudgeon and pintles, so I cut some insulators out of a milk jug. Might not be necessary with the powder coating, but it can’t hurt.

The notch in my new mast partner ended up just a hair smaller than the original, so I needed to thin down my leather padding. I sharpened a little thumb plane razor sharp and it worked surprisingly well. Leather seems to have a grain to it since it would dig in one direction, but cut beautifully in the opposite. I took the leather down to about half its original thickness.

Added a small cleat to the sprit which will hold a line running through a bee hole from the peak of the sail. I figure this will make rigging easier, rather than trying to catch the peak in a notch on the end of the sprit.

Through a convoluted story, I ended up with this little outboard. It’s a Honda BF2A that looks to be in pretty good shape. It seems to make decent compression and everything turns freely. The only catch is that it’s missing about $300 in parts. It needs a carburetor, gas tank, air guide, and throttle linkage. I’m currently trying to decide if it’s worth fixing up, especially since I don’t know that it’ll run. I would really like to replace my British Seagull with this since it’s a 4 stroke, even though I don’t really run the Seagull enough to worry about the crazy oil ratio.

Trailer Maintenance

I’ve been working on the trailer while the boat was hanging in my shop. I built a platform to support the keel and keep the trailer from scraping the paint off when I launch. I also lowered the side bunks and moved them ahead a bit. After the platform was built, I took the wheels off to repack the bearings and change the dust covers for some Bearing Buddies.

I’m glad I did because I was greeted to a handful of rollers spilling out of the hub when I took the wheel off. This trailer is pretty old and I don’t think the bearings have ever been replaced. Anyway, I bought some new A-4 bearings, packed them, and got the wheels installed again.

Next I stapled some bunk carpet to the new platform. There’s a wooden block that supports the keel’s rocker up forward under the carpet. I added a jack too, so I don’t have to move the trailer with a dolly or the winch handle. The red bow stop is new as well, the previous one was a black rubber roller that left black marks on the bow. Hopefully this one doesn’t make my boat look like I ran over a scuba diver.

And finally I got the boat back on the trailer. I’ve bedded all the fittings that go on the deck which was a job. You don’t think it should take that long to bolt stuff down but it does. It didn’t help that I had to remake the backing plates because I put the originals somewhere for safe keeping… I still need to clean and paint the inside of the boat before I can put the inspection hatches in.

And of course no project would be complete without uncovering more problems than you started with. The trailer lights have quit working, even though they’re only a year old. They’re LED and I always unplug them before backing into the water, so I think there’s a corroded connection somewhere. I’m getting 1.5 volts measuring between the trailer ground and the plug. There’s a complete circuit but I guess there must be too much resistance somewhere for the lights to work. Anyway, I’m thinking about running a dedicated ground line to each light and changing the wire nuts to those heat shrink butt connectors. Either that or make some clamp on lights and remove them when going into the water. Whatever I do, I don’t want wiring the trailer to become a yearly thing!

Odds and Ends

When I built the boat I didn’t take the time to over drill fastener holes and then fill with thickened epoxy. So as I have been epoxying things I’ve started working on the holes. I also shortened the oarlock pads since the bolts didn’t actually land in the doubler underneath the deck. That was a measurement error on my part in the rush to get the boat ready for a vacation. Here’s how to enlarge an existing hole with a Forstner bit.

I’ve never been happy with the slot in the end of the sprit that catches a loop of line in the sail’s peak. So I filled it with a block of wood which I’ll smooth down and then drill a bee hole though. I’m planning to have a long length of line tied into the peak which will go through the bee hole and down the sprit to a cleat. That should make it easier to get the sail rigged.

The hard rubber rollers on my trailer have started chewing up the edges of the keel, so I hoisted the boat off the trailer with a chain fall so I could get under there to sand and epoxy. A strap around the main thwart almost perfectly balances the boat, and a line to the bow fitting keeps it from nosing down. I’ve also started painting the bare spots to build them up a bit before I paint everything else.

I’m hoping to have the boat done by the end of the month. Hopefully everything will go well and I’ll be sailing soon.

Mast Partner Progress

I got my aluminum mast partner back from the powder coater recently and dry fit it to the boat. I’m using four 1/2″ bolts to hold it on, so I drilled some 9/16″ holes in the bulkhead and sealed the wood with epoxy. Hopefully I can start painting and reinstall the fittings soon.

First of three rounds of epoxy to seal the bare wood and inside of the holes.

Testing the mast partner

I did have a bit of a disaster before I could dry fit it… I managed to get a bolt stuck in some left over powder coating down in the threaded hole. So I drilled it out with a left hand drill bit, picked out the threads, and then chased the threads with a tap.

Milling the bolt down flat so I can have a good starting point for the drill. You can use calipers to find the center point, but I usually just eyeball it. With a small diameter spotting drill you can get within .010″ without too much trouble.

Sometimes the stub of bolt will come out if you drill aggressively with a left hand bit.

All’s well that ends well.

Side Bench Improvements

We’ve had a few days of decently warm weather lately so I’ve been able to make some progress on the epoxy work. I’ve added oak ledgers to the thwarts to carry some side benches, overdrilled and filled the fitting holes with thickened epoxy, faired out the area for the mast partner, and added a doubler to the centerboard case to carry a pair of cleats for the downhaul and snotter lines.

The ledger on the forward face of the sternsheets had to be split in half to clear the flange on the inspection hatch. I’ve temporarily screwed it on with deck screws while the epoxy cures, but I’ll later remove them and fill the holes. I tried to give everything a smooth shape so hopefully it won’t be too hard on the back if I rest against them.

Looking forward, this one is fastened so it is flush on the bottom with the thwart. I’ve placed them so a 3/4″ board will make a flush sleeping platform.

Here’s the plywood doubler that will take the downhaul and snotter cleats. I’ve also smoothed out the area for the mast partner with a skim coat of thickened epoxy.

Here’s the updated todo list:

  • Rebed all the fittings
  • Install the mast partner
  • Make side benches
  • Paint everything
  • The keel is getting a little chewed up from the trailer rollers
  • Build a flat bed on the trailer so the keel is supported better
  • Repack the trailer bearings
  • Possibly lower the spring weight on the trailer.

Winter Maintenance

Spring is coming so it’s high time to get the boat ready. I’ve built a new mast partner out of aluminum which is currently off being powder coated coated green. You can see more pictures of building it here.

I’ve also repaired the splits in the mast which happened at the same time my mast partner cracked. I kerfed the problem areas with an oscillating saw, saturated the gap with neat epoxy, and then troweled in thickened epoxy until it was full. While I was at it I got the mast closer to round and shortened the snotter cleat to a minimum.

And finally I’ve been busy varnishing. It’s too cold out in the garage so I took over the living room while my wife is out of town. I put 8 coats on the mast and 2 on everything else since the varnish was in pretty good shape. Don’t mind that half finished breakfast nook in the background that my wife wants!

There’s still quite a bit to do on the hull, but I need to have warmer weather to do some epoxying and painting. I need to:

  • Over drill all the fitting holes and fill with epoxy before redrilling for the fasteners
  • Rebed all the fittings
  • Install the mast partner
  • Epoxy a pad on the centerboard case for a snotter cleat
  • Epoxy ledgers to the thwarts for side benches
  • Make side benches
  • Paint everything
  • The keel is getting a little chewed up from the trailer rollers
  • Build a flat bed on the trailer so the keel is supported better
  • Repack the trailer bearings
  • Possibly lower the spring weight on the trailer.

A lot to do!

Cracked Mast Partner

Recently my wife and I went on a week vacation down to Hatteras on the Outer Banks. I took my boat along with some grand ideas for sailing adventures, but it just didn’t work out. Most days had thunderstorms and rain, and the one day that was clear we changed locations since our neighbors were loud. At the second location I had to park my boat outside and with all the rain we had I probably bailed 50 gallons of water out every day. I also learned that the hatches aren’t totally watertight. I’m sure they’re fine in a capsize, but not with water sitting against the seal all day.

At the end of our vacation I noticed the mast partner had cracked as well as one of the staves in the hollow birdsmouth mast. I had the same problem with the mast partner in 2019 when we went down to Ocracoke, but I attributed it to poor workmanship when I originally built the boat. But now I’m beginning to suspect it has something to do with the wood moving around the incompressible bronze belaying pins. I usually keep the boat garaged and I’ve seen no evidence of cracks all summer and I’ve had the boat out in some rough weather.

The mast partner is a lamination of two 3/4″ yellow pine boards with a layer of 6oz fiberglass in between. The grain is fairly large and the fiberglass is along the neutral axis so it’s really not doing much. Either way, I’m not going to try repairing it again since it’s clear the materials aren’t up to the task.

I do metalworking for a living, so I’m planning to TIG weld up a new partner from aluminum and have it powder coated. Maybe green, maybe white… not sure yet. It’ll have four belaying pins welded on and possibly an integral bullseye for the snotter so I can run it back to the cockpit. I think it’ll have threaded studs welded on that go through the bulkhead to be secured with nuts and a backing plate. And I’ll probably mill a shallow groove all around for a wad of butyl tape to keep the water out.

I’m done messing around with dead tree carcass! haha

Windmill Point to Gloucester Point 2020

August 28th, 2020

Recently it came to my attention that the last time I went sailing was two months ago. In my defense, I have been super busy with work and the month of humid, blazing hot weather didn’t help either. Anyway, after looking at the weather I decided to take my boat out on a really long trip from Windmill Point to Gloucester Point on the Chesapeake Bay. In the morning the wind was forecast to be westerly with a falling tide, while the afternoon would be southerly winds and a rising tide. That means I would have a beam reach down to the York River, the wind and tide would change, and I’d have another beam reach up the river. Easy peasy. If all goes well it should be about 36 miles.

I didn’t realize the sprit was outside the brail line until I’d gotten everything rigged and I was ready to launch. By that point I was getting on for 45 minutes late, so I decided to go with it. Besides, Thames sailing barges brail their sails like this and they seem to know what they’re doing.

Heading out of the Windmill Point Marina on a nice beam reach. The waves were just below whitecap stage and I was making 6.5-7 mph.

I had a nice pink sunrise while I was rigging the boat.

One last look at Windmill Point. Those houses have a beautiful view, although probably a little too good during hurricanes and nor’easters.

I had a stroke of genius heading across the Rappahannock. Since I’m going to be on starboard tack for 20 miles, why not put all my stuff on the windward side to help with the hiking? I bet fishermen figured this out hundreds of years ago.

A bit south of Gwynn’s Island the wind started to die down, so I figured I’d head out towards the Wolf Trap lighthouse in hopes of stronger wind. You can just make it out on the horizon.

Unfortunately the wind seemed to die altogether as I approached the lighthouse. I was staring off at the horizon wondering what I should do when I heard a blast of air and a pod of dolphins swam by! I wish they were closer for a better picture, but whistling and yelling “here boy!” didn’t seem to have much effect.

About a mile from the lighthouse I resigned myself to rowing. It was interesting to see first hand how it takes the waves a while to settle down once the wind dies. I’d always assumed if there are waves then there must be wind, but that’s not the case.

I brailed up the sail and started rowing at 4.5-5 mph, although an unknown amount of that was due to the tide. My plan was to head closer to shore in case I decided to pull out at Winter Harbor Haven, but it was only 11:30am so I still had the whole afternoon to see what happens.

After rowing about 1.5 miles I noticed a few catspaws so I quickly lowered the brailed mainsail, raised the jib, and started sailing. The wind had shifted southerly like it was forecast, but I hadn’t made it as far south as I’d hoped. The tide was still helping a little though. Anyway, that’s New Point Comfort and the entrance to the Mobjack Bay. I’d been sailing with four catamarans since the Piankatank River but they peeled off and headed there.

Because of the angle I couldn’t quite make it into the York River, so I tacked and headed out into the Chesapeake Bay. Eventually I figured I’d be able to just slip in so I tacked again and headed for the oil refinery. I couldn’t point quite that high, but I did the best I could.

Into the York River! There’s a lot of low lying marsh that made it a little difficult to determine where to head, but in the end I just snuck through. Maybe in the future a drawing of the land and some sort of device that always points in the same direction would help. Nah, probably a crazy idea.

To be honest, this trip has been a little boring. Sailing 40 miles in a 15′ boat will be a nice accomplishment, but otherwise I’ve been too far off shore to see much. All day it’s been the horizon on the left and green smudges dotted with houses on the right. So I decided to sail through Allen’s Island to liven the trip up. The wind was just a whisper while I ghosted along. I stood up to try and spot any shallow parts since I’ve never been here before.

Looking back after gliding through the marsh grass. It reminded me of videos I’ve seen of those English guys sailing the Mersea duck punts.

Unfortunately Allen’s Island is suffering from rising water and erosion just like everything on the bay. The picture on the left is from 1994.

The end was in sight but the wind just had to die again. You probably can’t make anything out, but the schooner Alliance is out for its daily sunset cruise and there’s a tall memorial at the Yorktown battlefield marking the end of the Revolutionary War when Cornwallis surrendered.

A small puff of wind hit and I tried sailing wing and wing. I was going nowhere fast and my folks were coming to pick me up, so I needed to be making progress!

Time to brail up the sail and row for the third time today. One of the guys on the fishing pier asked me where I’d come from and had a shocked look on his face when I told him.

Finally tied up at the Gloucester Point boat ramp, 40 miles later! It’s pretty wild how fast the current moves through here, although it makes sense. The river is only 1/3 the width of the mouth so all that water has to speed up. You guys in the north west probably think this is child’s play though. So that was my trip. 40.8 miles in just over 10 hours. My maximum speed was 7.9 mph as I was coming across the mouth of the Rappahannock, but the average was 4.1 mph. It definitely would have been slower without the tide helping me… it was a pretty calm day.

And here’s a shot of the boat ramp. I’m glad my folks came to get me with their pickup because I’m not sure my little economy car would have done too well. I probably would have to put the trailer in the water by hand and pull it up the ramp with a rope.

Wolf Trap II 2020

June 27th, 2020

Today was forecast to be 90º with 10 mph wind and I thought it would be a great opportunity to attempt to round Wolf Trap light again. A few months ago I made it to within about 350 yards, but I turned back because the wind really picked up and it didn’t feel entirely prudent. I talked my wife into coming with the promise that we’d stop at the sand bar on the way home. We went 19.8 miles in 4:22 with an average speed of 4.5 mph. Our max was 8.8 mph which is the best yet! I think the extra weight of two people and gear might have helped keep her flat.

Rigging the sail in the parking lot which wasn’t nearly as packed as it was the last time we launched, although we did arrive a bit earlier. I managed to get launched in just under 30 minutes which is a record too. I’ve got a few ideas to make rigging simpler that I’d like to experiment with.

I’m pretty pleased with the name I painted a few days ago.

Setting off from the ramp and heading down Milford Haven close hauled. We had to make one tack to get angled right to make it through the channel which leads into the bay. How was this photo taken?

By my lovely wife risking life and limb!

Out into the Chesapeake with the lighthouse just a tiny spec on the horizon six miles away. It’s incredible how calm things are compared to the last time I was out here.

Starboard!

Getting closer to the lighthouse. We were making good progress towards the light, but the wind shifted and we had to bear off out into the bay a little further. Then I tacked too soon and we missed the light, so we tacked again to work our way back.

But eventually we got there and rounded it.

Coming around the southern side.

Somehow I doubt the uh… facilities… were a particularly comfortable place in the dead of winter with the wind howling up the bay.

Heading back towards Gwynn’s Island.

My wife got feeling a little seasick while we were going downwind, so she retreated to the starboard settee in the salon. The waves were probably 2′ or so and produced a rolling motion which thankfully has never been a problem for me, although after a long day I do feel like I’m still rolling when I go to bed.

Coming back through the hole in the wall we made a right and found an empty spot on the sandbar.

The wind had picked up a bit, so I brailed up the main sail and we came in with the jib only in an effort to keep our speed down. However, that didn’t really help as we were still going 5 mph downwind towards the shore. I tossed my homemade anchor out, payed out some line, and it immediately brought us to a screeching halt. I’m impressed with how well it works.

Anchored on a lee shore in ~15 mph wind. I felt around the anchor with my foot and the shank had dug in completely. I paced off back to the boat and found we had about 7:1 scope. Probably hard to mess up with that much line out, plus the bottom was sandy.

Hanging out on the beach for the afternoon. The point was packed with boats and one guy was busy trying out a kiteboard. A few times our tent threatened to join him.

We found some washed up cedar trees and erosion on the other side of the sandbar. It’s always a little depressing seeing stuff erode way. Growing up I sailed my Sunfish to Grog Island once, but it’s completely gone now.

Eventually we decided to head back to the ramp and disaster struck. Trying to sail off the anchor on a shallow lee shore with no practice in gusty wind with someone with little experience with other boats anchored around is not a good combination. Eventually we made it, but not before briefly putting the rail under and losing the anchor in the process. My wife looked traumatized, so I decided to just leave it and come back tomorrow. Plus it’s a prototype and I’ve got some ideas for improvements.

After hauling out and heading home I saw this knucklehead on the bridge. Three slack tires and one completely off the rim. I ran up to his window to let him know but he said it was ok because he wasn’t going far.

June 26th, 2020

The next day we decided we’d make our ship sail against wind and current by lighting a bonfire under her deck. Yes, this is a British Seagull 40 Plus a friend gave me and it turns dinosaur squeezings into noise and vibration. As a side benefit you even get some forward thrust! Not great for the environment, but I figure with biodegradable oil and a 25:1 conversion it’s not too bad for how little I use it.

We motored out to our spot from yesterday at 5.5-6 mph, but the anchor was gone. I guess I have too much faith in humanity to have hoped someone would leave it coiled up on the beach. I improved the tiller with a piece of cedar driftwood whittled to wedge inside the handle.

We sat on the beach for a little while before the daily afternoon thunderstorm showed up so we headed back.

Puttering back to the ramp while everyone else passed us in a much quicker and quieter fashion. Sitting on the bow improved our speed by about .2 mph to just over 6mph.

Close to the ramp it started to rain, but we made it back in one piece! For some strange reason my wife says she is done with boating adventures for a while.