Long Steps Build #5

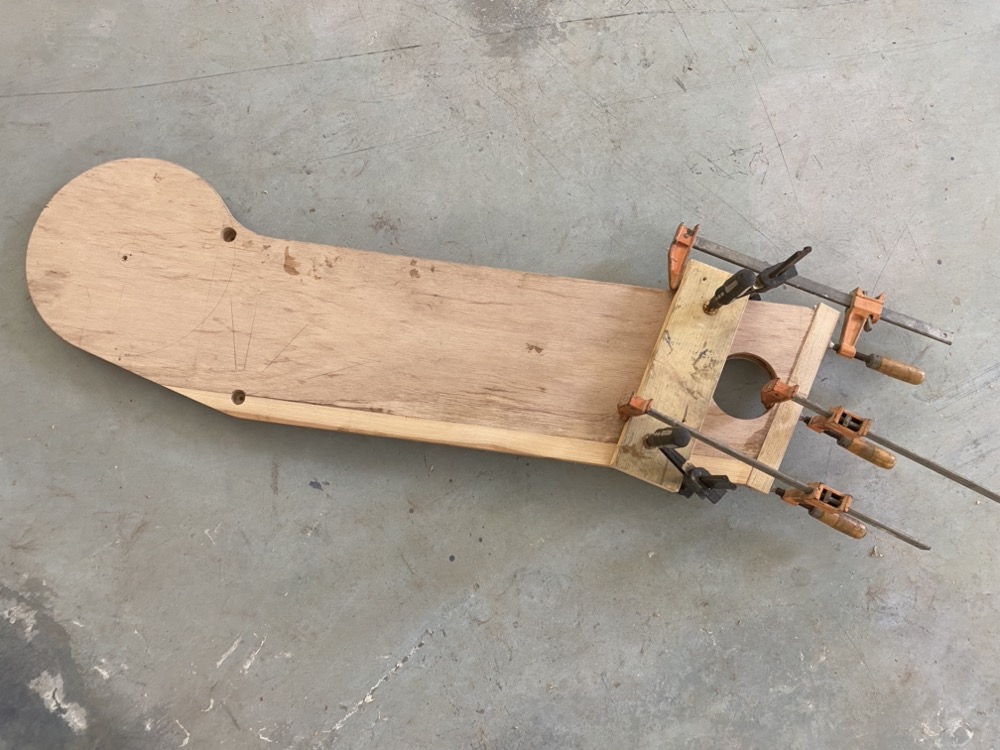
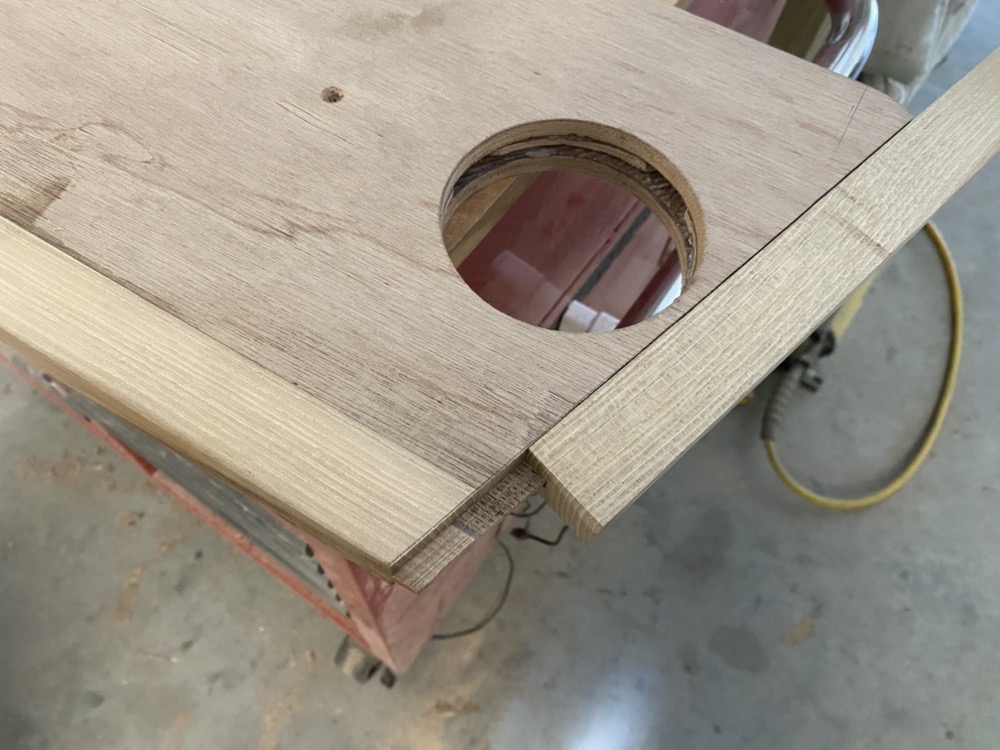
Lately I’ve wanted to complete an item since the boat is coming along all at the same pace so I decided to build the rudder. It’s laminated from a 1/4″ piece sandwiched between two 3/8″ pieces. Here I’m gluing on some oak edge protectors.

The edge protectors are tongue and groove and the hole is for lead ballast. I cut three little notches into the 1/4″ piece so the lead will flow in there and lock itself in place.

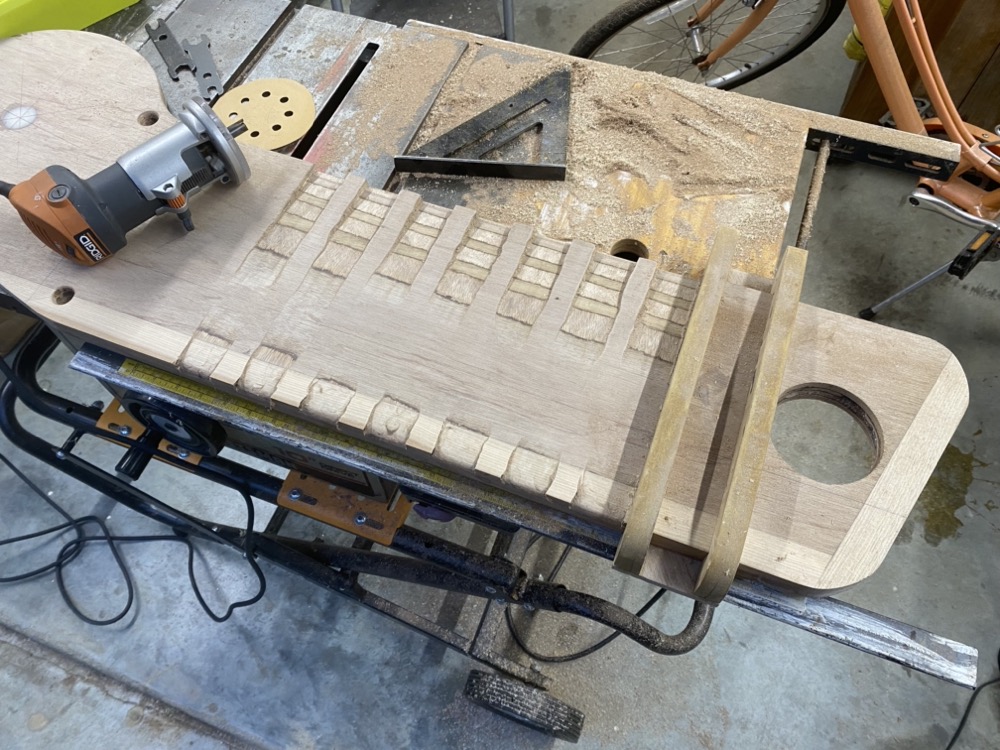
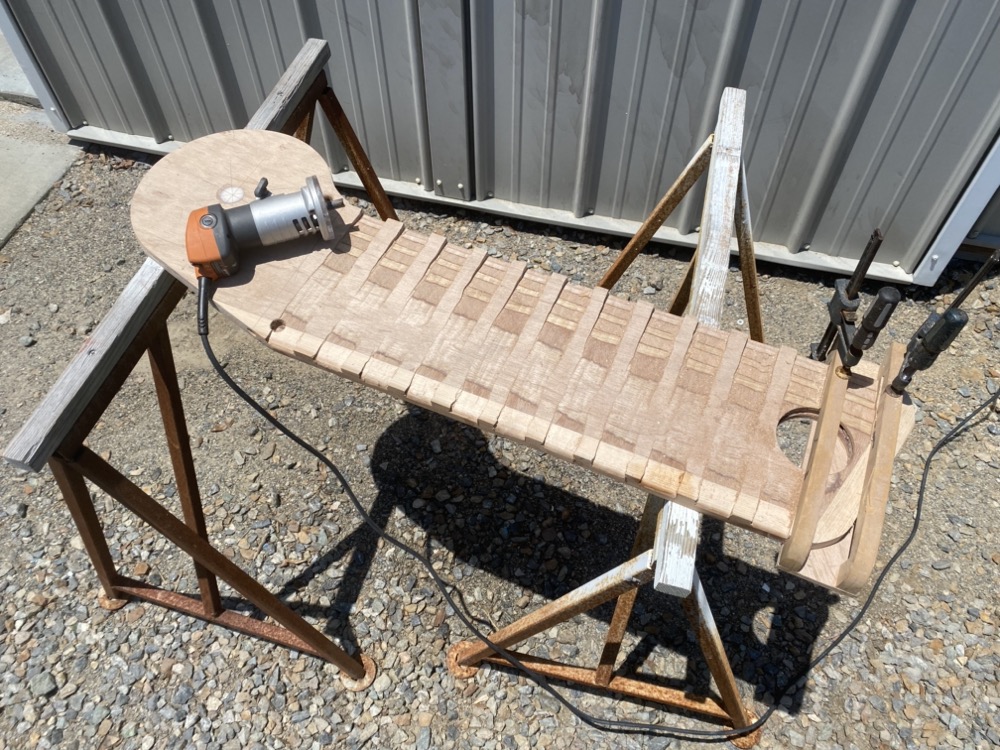
Next I made a router guide out of some MDF to cut the foil shape. It is tight enough to stay put on the rudder blank and I left the flat spots to I have something to index off of on the other side. The guide worked really well, better than I thought it would.

Towards the tip though it does need to be clamped on. A 36 grit Roloc disk in a die grinder makes short work of the flat spots and a DA sander cleans it up. It’s pretty easy to use the plys like a topo map to keep the shape right.

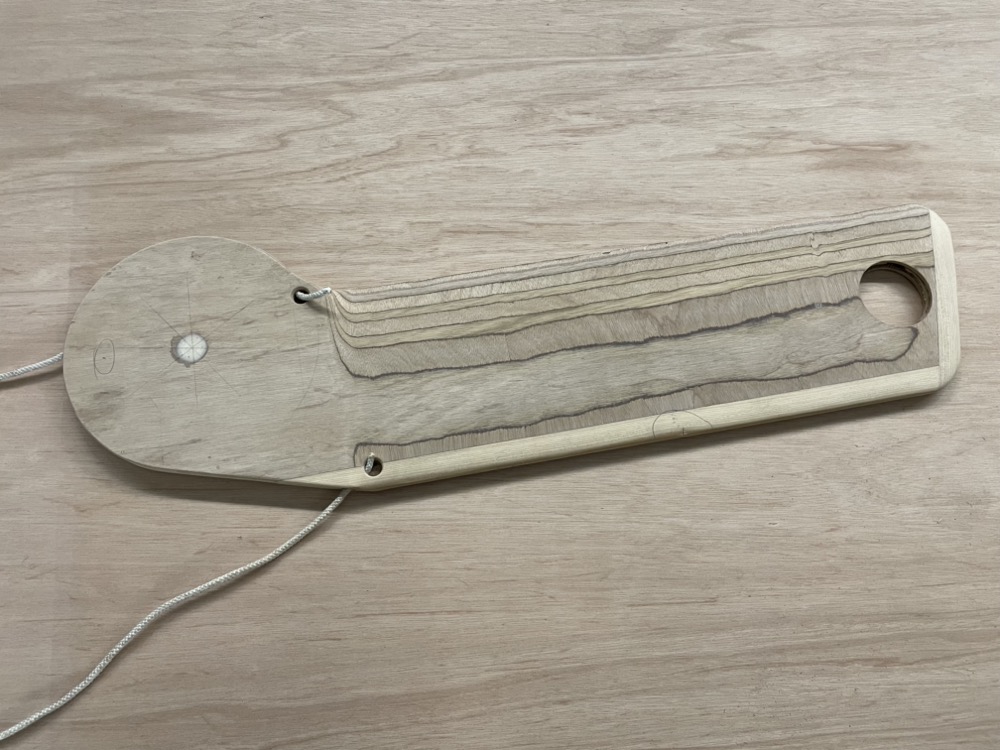
The holes are for stopper knots on the up and downhaul lines. The 1/4″ layer has a slightly smaller diameter so the two outside layers make flanges that guide the line around the pivot. I ran a drill bit on it’s side through there to clean up the epoxy and grind the wood into a nice smooth shape for the line to sit in.

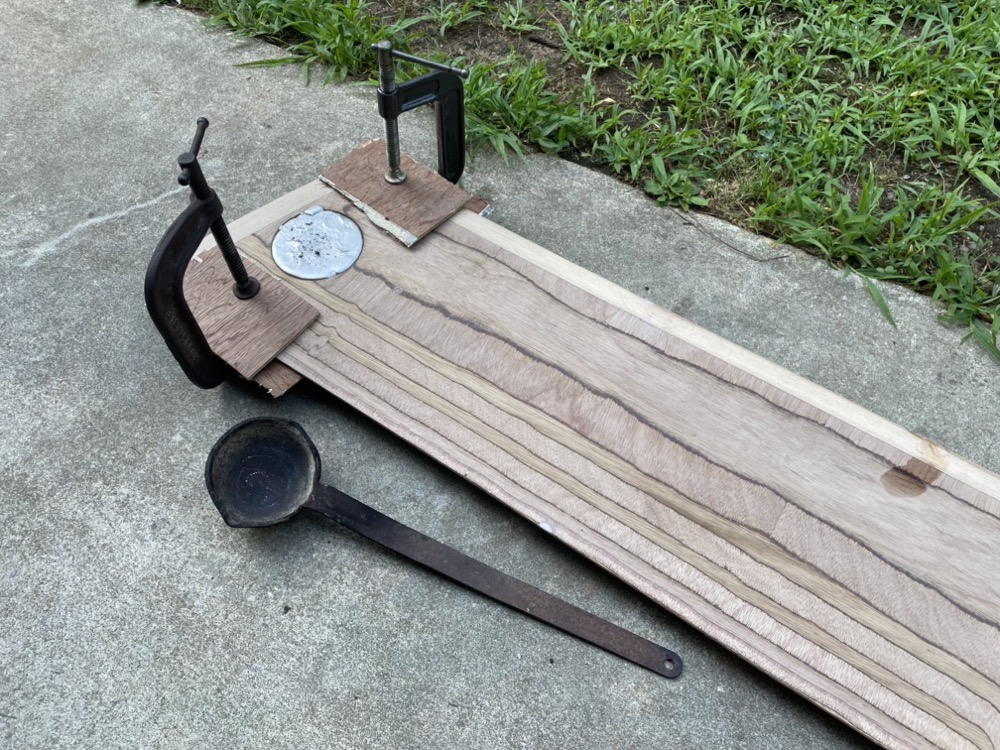
Next I melted some lead shot to pour into the tip. Just a thin piece of ply clamped to the underside kept the lead from leaking out.

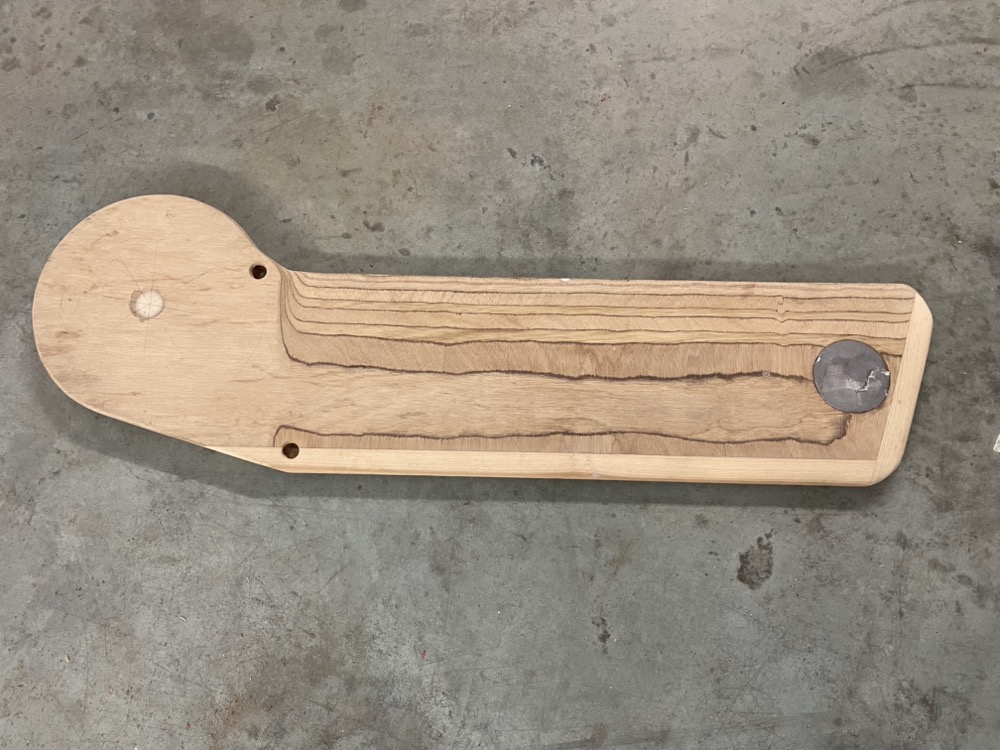
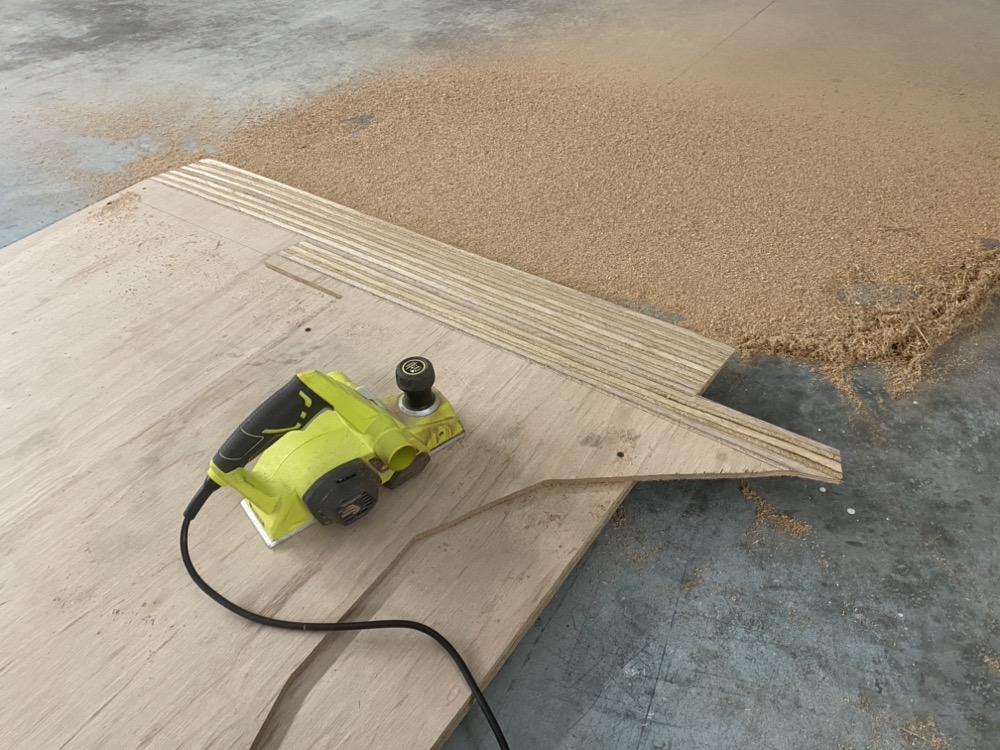
After a bit of power planing I brought the lead down to the level of the wood and after some minor fairing it’ll be ready for fiberglass!

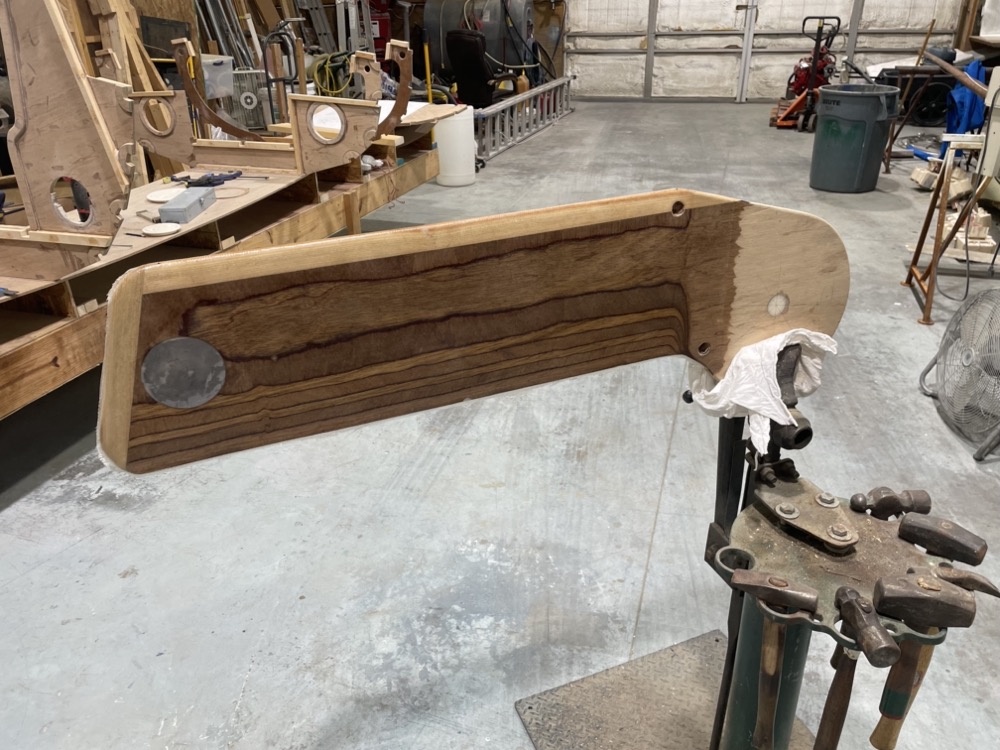
First I wet out the board with epoxy, then I put a ~3″ strip of 6oz fiberglass cut on the bias around the bottom of the tip. I pre-shaped it dry a bit and it conformed surprisingly well. Then I draped on some cloth and wet it out.


Hatteras 2024

8/31 – 9/7/2024

Off to Hatteras on North Carolina’s Outer Banks for our 2024 beach vacation!

Getting everything loaded up Friday night before the trip. I don’t know why, but every beach trip seems to be a flurry of packing right at the last minute. Thank goodness for my sailboat checklist!

I launched at the Village Marina on Saturday evening to motor the 2.5 miles back to the condo with my trolling motor. Dinkey’s and Breakwater restaurants were in full swing with music blaring and I got a lot of curious looks from people on the docks as I went by. I heard one guy wondering why the boat was so quiet.

It was really cool going through the narrow channel with houses on one side and marsh on the other. I have no idea how deep or wide the channel is, but there were some pretty big boats I passed along the way.

I stayed relatively close to the shore and as it got darker I didn’t realize I was in really shallow water. The centerboard grounded and the motor quickly got fouled with grass. Eventually I pulled out the oars and rowed back into the channel. I came across a number of PVC pipe markers in “The Slash” but it was too dark to know what they meant, so I just stayed as close to them as I could.

Eventually I made it to the condo and got the boat tied up.

My slip was nearly at the end of the canal and we had a good view from the third story looking out towards the sound.

Unfortunately during our stay a storm came up the coast and most the week was super windy or pouring down rain. Sunday looked like the best opportunity for anything boat related so my wife and son and I took the boat out for a quick trolling motor cruise.

We nosed up pretty close to the Slash Creek Bridge on route 12 before turning around. A few weeks after we left North Carolina Department of Transportation started a 4.5 million dollar project to replace the wooden bridge with a concrete one which is supposed to be finished by the end of May 2025.

Heading towards a narrow cut around the pair of islands in The Slash. We later ran out of water and drifted into the marsh a bit before I could get the oars rigged and row us back to deeper water.

Back to the dock at our condo.

Here’s our track. 1.4 miles in 28 minutes.

Strong winds kept the boat pushed over towards the finger pier for days. It was kind of funny how lopsided the scum line was when I hauled out on Saturday. My bilge pump and LiFePO4 battery kept most of the rain water out, although there’s no real sump so the bottom collects an inch or so of water.

We were smack in the middle of the purple with 45 mph gusts.

One morning looking out the window I saw this center console stuck in basically the same area I drifted into. It took him a while, but eventually he wiggled off.

On Wednesday when it was super windy we took the ferry over to Ocracoke. The ferries used to hug the point before looping around, but I guess the inlet has shoaled up enough that they need to head north east before turning towards Ocracoke. What used to be a 45 minute ride is now more like 1:25. It was one of the roughest trips I can remember with quite a bit of spray coming over the bow. Every now and then we’d hit a wave just right and there’d be a loud thud and a couple times I wondered if we’d hit the bottom.

Henry had a fun time on the ferry. We rode the River class Floyd J. Lupton over and he got to wave at the W. Stanford White along the way. These are newer ferries with an off center island so there are three rows of cars on one side and one on the other.

On the island we checked out the inside of the lighthouse, hiked the Springer’s Point nature trail, got lunch at Eduardo’s, drove out on a deserted beach for Henry’s nap, went to the Village Craftsman and Ragpicker, got ice cream at the Slushy Stand, and checked out a few areas of personal significance. Ocracoke is my favorite beach vacation spot since I grew up going there most years. But I have to say it’s just not the same anymore. Everything is way more commercialized and touristy than I remember and I don’t think it’s just from rose colored glasses of nostalgia.

On the way back we rode the Hatteras class Chicamacomico. These are the older style ferries with a center island and two pairs of rows that I remember as a kid. I remember climbing up the steps to the lounge area smelling the salt air and feeling the wind blowing in my hair. I never went into the lounge much since I didn’t like the smell of all the smokers.

Friday was actually pretty decent so we made the most of it on the beach. The waves were still really rough and erosion from the storm was pretty wild. It was into the dunes in a lot of places and almost broke through Highway 12.

I took my Freiberger sextant along and made some practice sights. Someday when I have time (hah!) I’ll reduce them and see how far off I was.
Actual location: 35°12’14.8″N 75°42’21.3″W on 9/6/2024
Sight one: 13:20:11 – 31º 29.0′
Sight two: 15:19:23 – 52º 31.1′
Sight three: 16:56:27 – 60º 41.8′

Pretty soon the week was over and it was time to head home. Of course it had to rain Saturday morning when I wanted to haul out, but it was super calm and that was what was important. I put on a rain jacket and left right at sunrise.

With the benefit of research I figured out where the channel was and swung out much wider into the sound to avoid the shallow spots.

Turns out, it’s well marked if you know where to go.

Entering the cut to Hatteras Harbor.

Another guy came blasting up behind me but fortunately slowed down a bit as he got closer.

Village Marina is ahead and on the left, to the right is the main entrance out of the harbor. A ferry was going by before it turned out into the sound and back towards Ocracoke.

Back at the ramp where I hauled out. Later at the condo I got the spars all secured and the cover back on for the trip home. It rained all five hours on the way back!



Gwynn’s Island 2024

June 29th, 2024

Launching just across the bridge at Gwynn’s Island with a full load of beach stuff and the stowed sailing rig.

We motored 2.5 miles out to the sandy southern tip of the island in about 45 minutes. I didn’t keep track of the watts consumed, but it was slow going against the wind, tide, and chop. A couple of times we’d hit a wake and almost come to a stop.

About 50 feet from shore the amps suddenly shot up and progress ground to a halt. Fortunately it’s quite shallow and I could jump out to pull us to shore. I was surprised by how loose the grass was to still foul things up. I later swapped to the stock propeller but didn’t get a chance to test its weed shedding ability.

After getting our umbrella set up I started getting the rig together. We were the second boat out to the point and the other couple seemed pretty interested in what I was doing. I’ve only ever seen one or two sail boats out here amongst the horde of power boaters.

I haven’t sailed since last summer’s trip to Kure Beach and it took a bit of time to get the lines on the snotter running right. It’s so easy to get halyards outside of the jib sheets or the reef lines inside the sail’s robands. I put in a preemptive reef since it was blowing a good 10-15 with some gusts.

Eventually I got everything set and took off. Once I got some sea room I hoisted the jib which took a few tries to get tensioned enough. If I wasn’t building a Long Steps I think I’d build a homemade roller furler for it.

I didn’t take any pictures from the boat since I just bought a new phone and didn’t have a case for it. After getting the jib set up I headed downwind along the shore and then tacked my way back upwind to the beach for a 7.4 mile trip in 1.5 hours. It was slow going since everything was against me… the wind, the tide, a short and steep chop, and a reefed sail. The best I could do was a 150º tacking angle. Despite sailing at 5-6 mph on each tack, I only made 1.3 mph toward my destination. I’ve heard it’s often faster to row upwind than it is to sail and I think this might be some good evidence!
After lunch and Henry’s nap a ton of boats showed up. I thought the wind might keep them away, but a friend said more than likely it just takes a while for them to sober up from Friday night and get going.

Henry had a great time sitting in the sternsheets wiggling the tiller as the boat hunted back and forth in the wind.

Finally it was time to pack up and head home. I decided we could sail back to the ramp since it was dead downwind. I dispensed with the jib so there’d be fewer lines in the way and less things to keep track of.


Long Steps Build #4

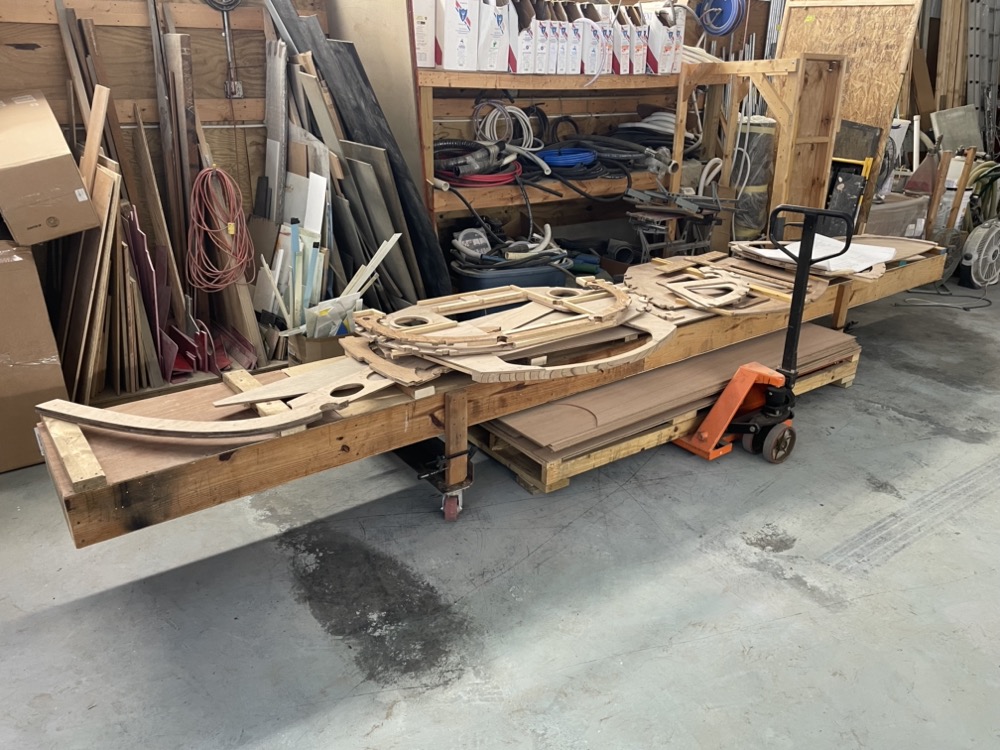
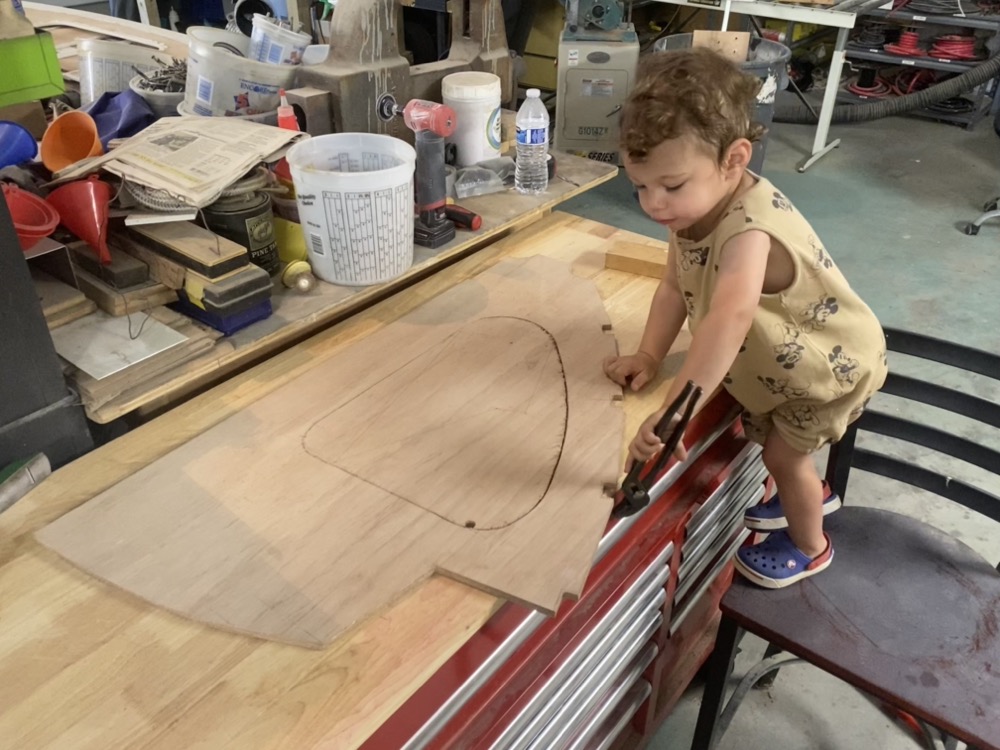
Slowly plugging away at more parts. My lunch hour consists of wolfing down a sandwich in about 10 minutes and then spending the rest of the time drawing or cutting out stuff. Later at home after supper I’ll often epoxy the parts together and work on the CAD drawings for the next day. Usually on the weekend I take my helper along to give my wife an afternoon to herself and he helps poke at the parts with some channel locks. Please excuse the pile-o-crap end of my coworker’s bench… I really need to put a wall up between it and my toolbox.

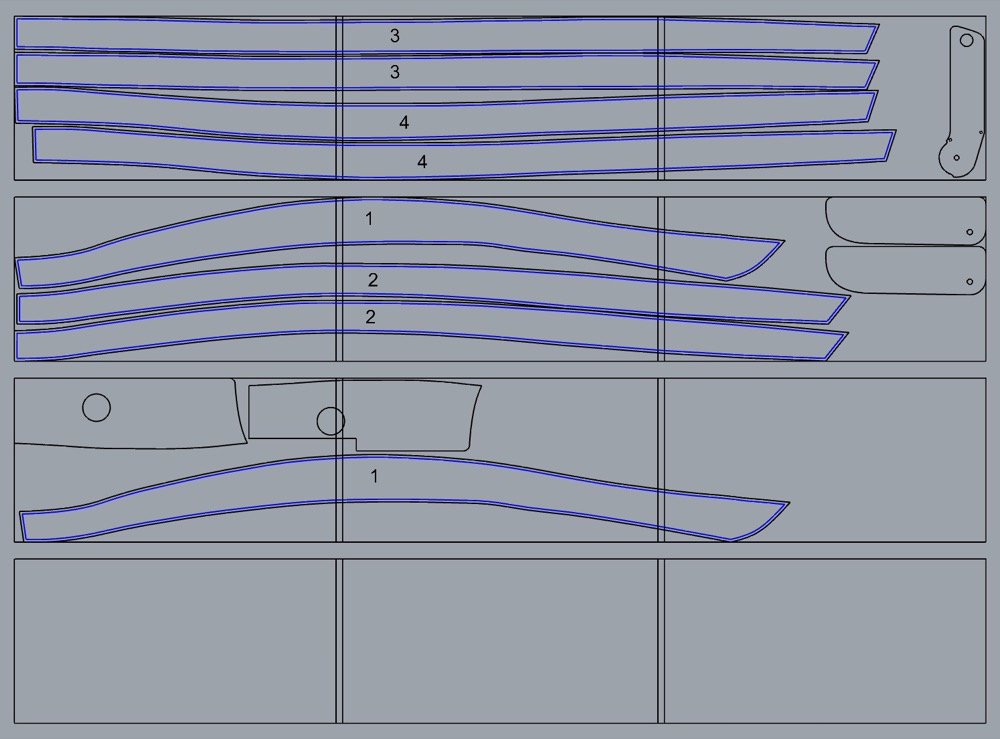
After cutting out the first half really accurately I lay it out on the last remaining bit of my sheet of ply. I’ll trace around it and cut it 1/4″ oversize, then screw the two pieces together and do the final trimming with a router and flush trim bit. I’ve been really pleased with how my CAD drawing and nesting the parts has worked out.

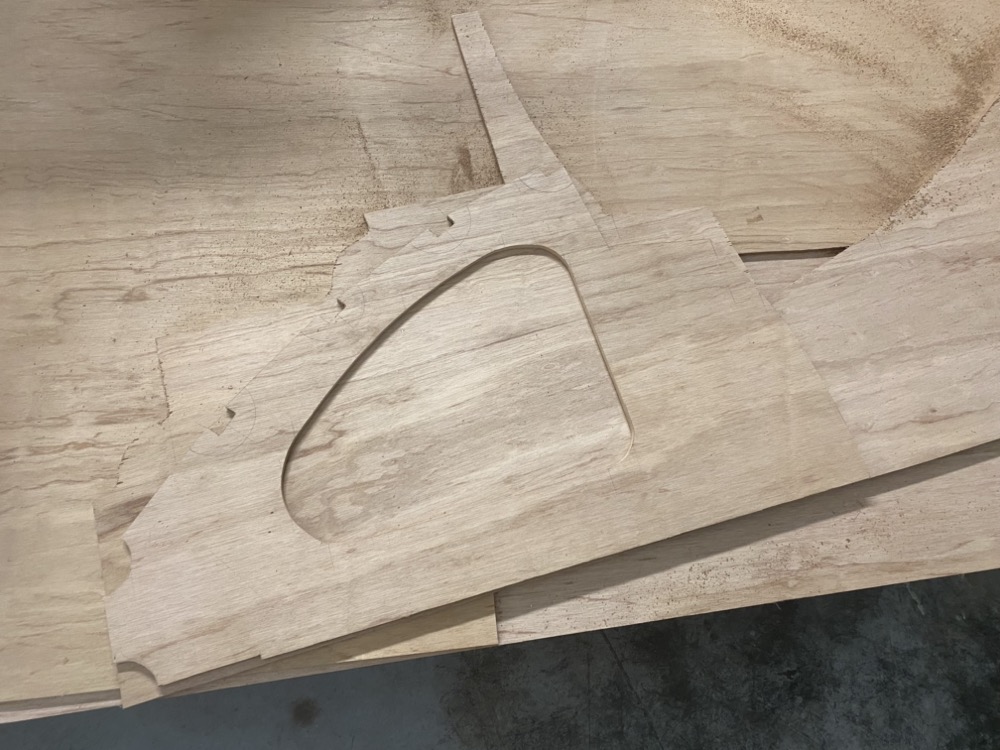
Two of the bulkheads aren’t symmetrical due to the offcenterboard, so I used the smaller side as a router template and drew in the missing part. Easy enough to bandsaw and plane that to size.

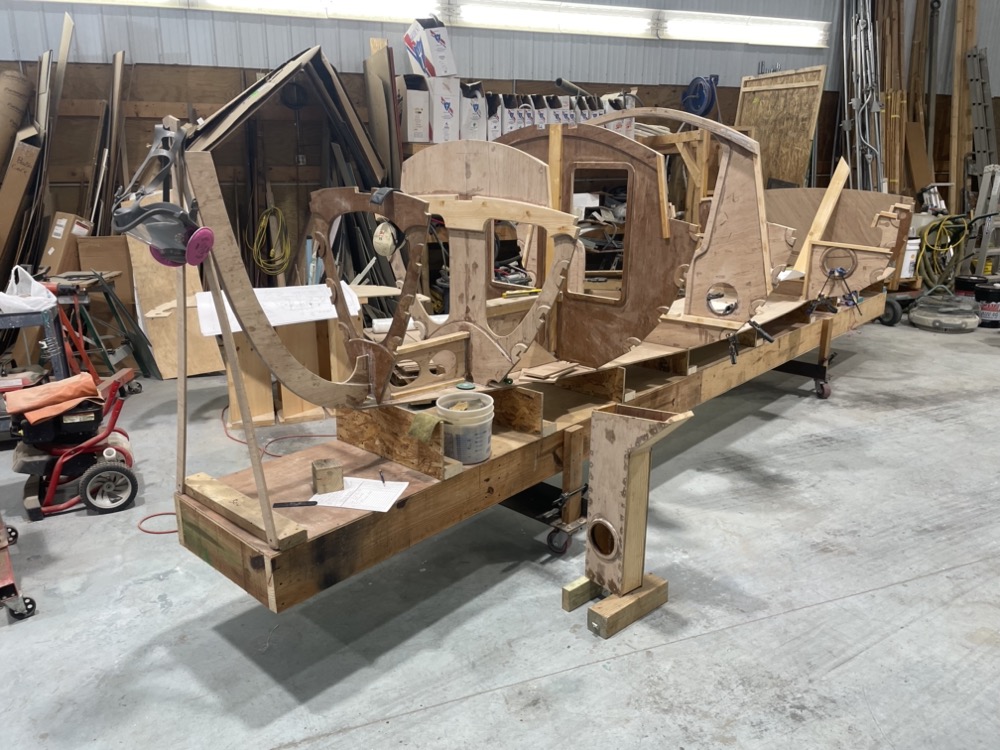
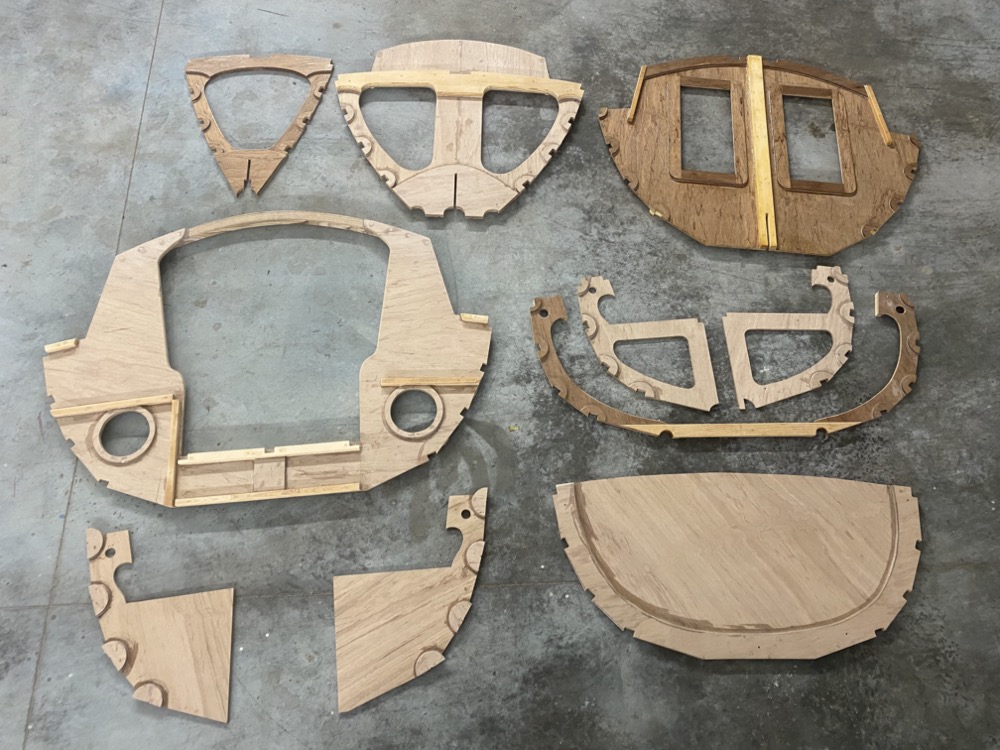
Here’s 8 of the 10 bulkheads in various stages of completion. On one hand it really bugs me that nothing is complete, but then again there’s always something I can use that last little bit of thickened epoxy on. I guess everything will get done at about the same time.

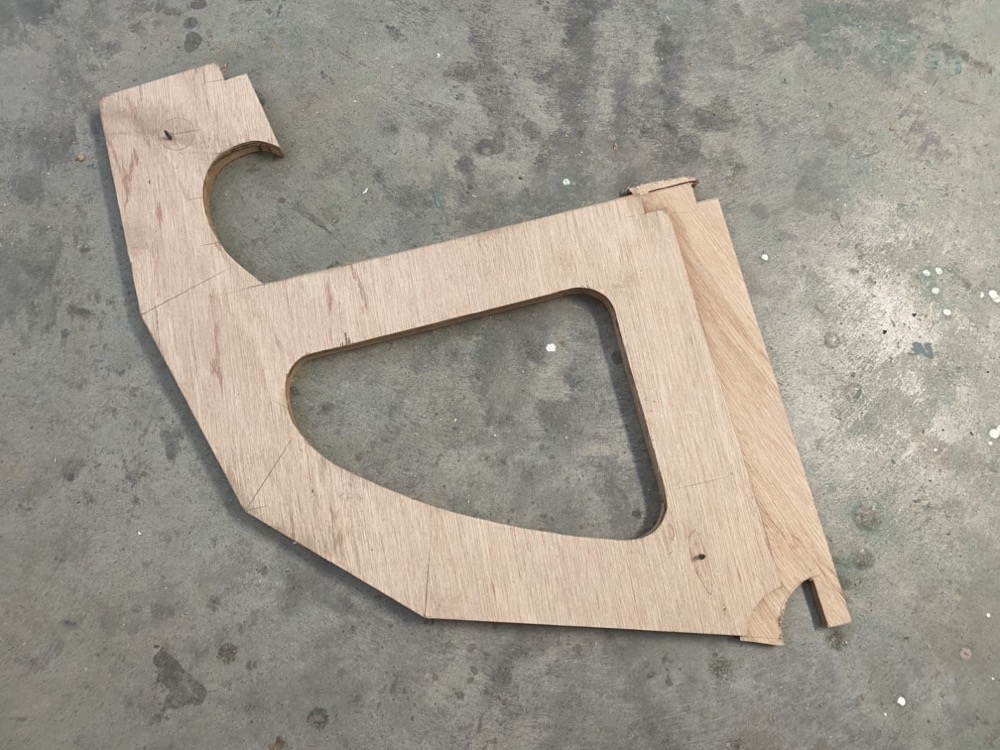
A few of the bulkheads are in two parts with asymmetrical sides so I found it easiest to mark a centerline and screw the parts to a sheet of ply with a few carefully measured reference points.

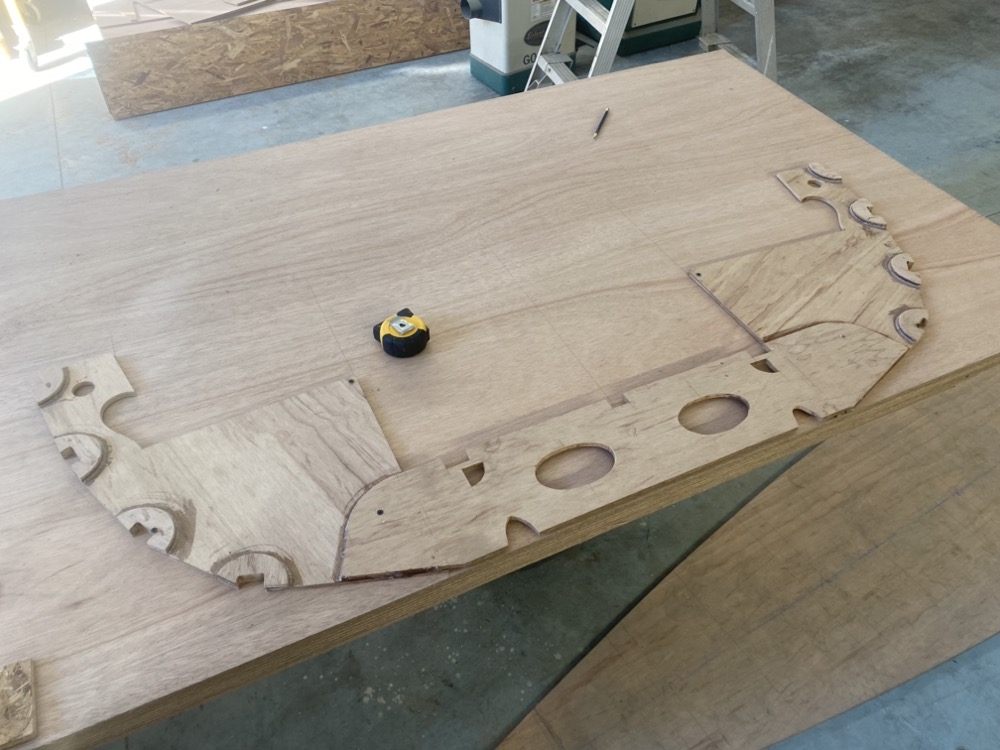
My wife and son are out of town for a week visiting family, so I’ve been staying at work till 9pm and making a lot of headway. I’ve finally got all the 3/8″ parts cut out so it was time to scarf the leftovers for the bottom panel. I’m doing an 8 to 1 scarf, so just draw a line 72mm back from the edge, screw the stack of wood together, and start planing until you end up with a slope from the line down to a feather edge. I gave this router the full Lou treatment and it is a real joy to use. https://youtu.be/_a1HCqK5i-A

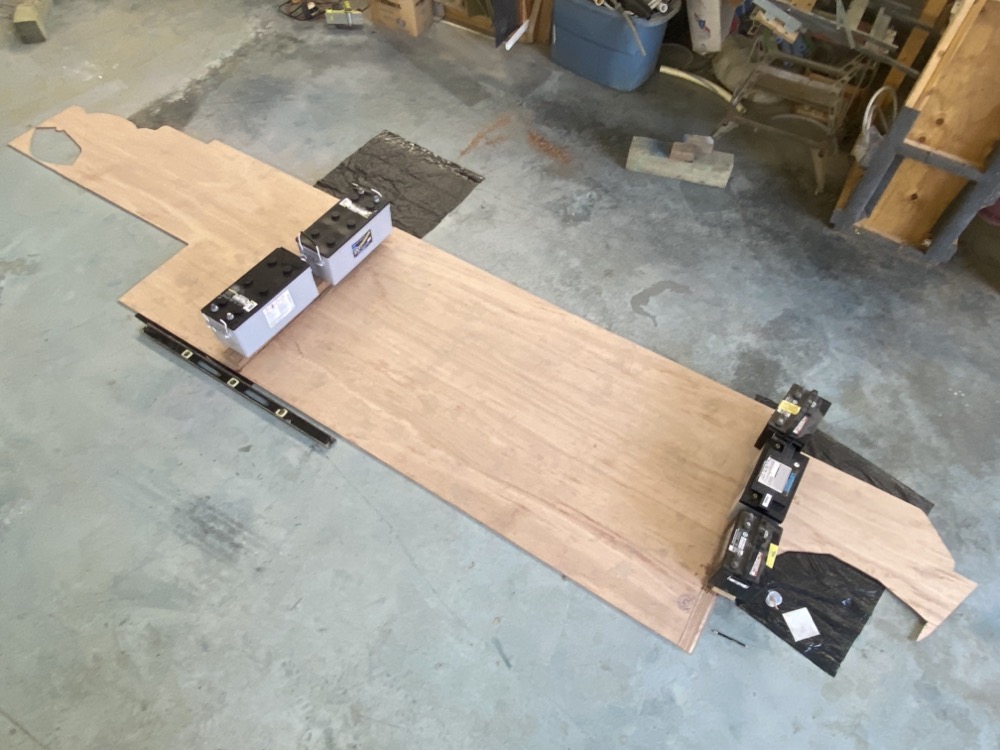
Next I epoxied the sheets together and used some old batteries and 2x4s to concentrate the weight right on the scarf. The bottom panel will run from between the cut out parts on the left, through the full sheet, and halfway into the section on the right. One side of the centerboard case will come out of the bottom along with two layers of rudder.

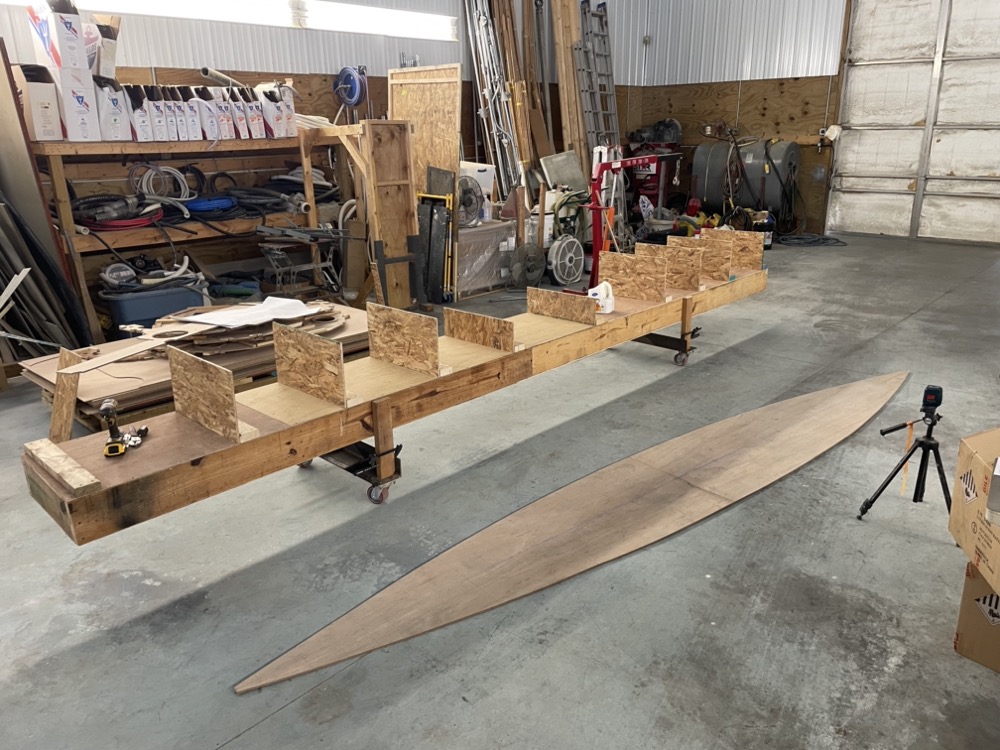
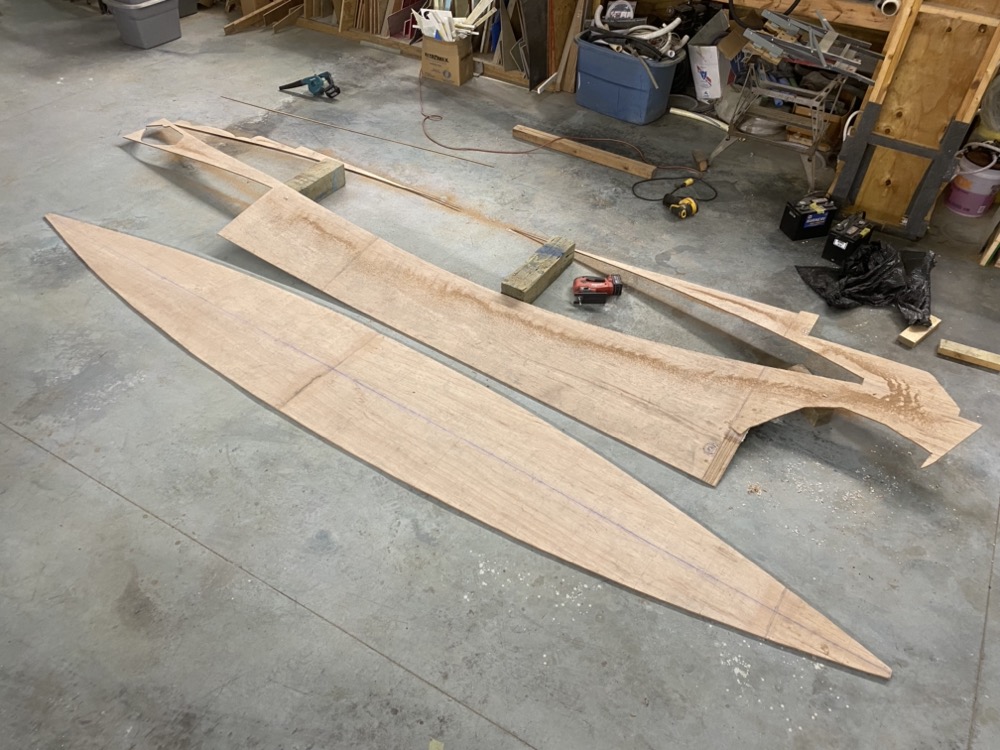
After the epoxy cured I struck a centerline and laid out the bulkhead locations and points for a batten to define the edge. The scarfs came out pretty good and a light sanding got them pretty flat. I’ll get the centerboard case and two rudder blanks out of the section that’s left.

Next I took the edge down to the line with a little plane.

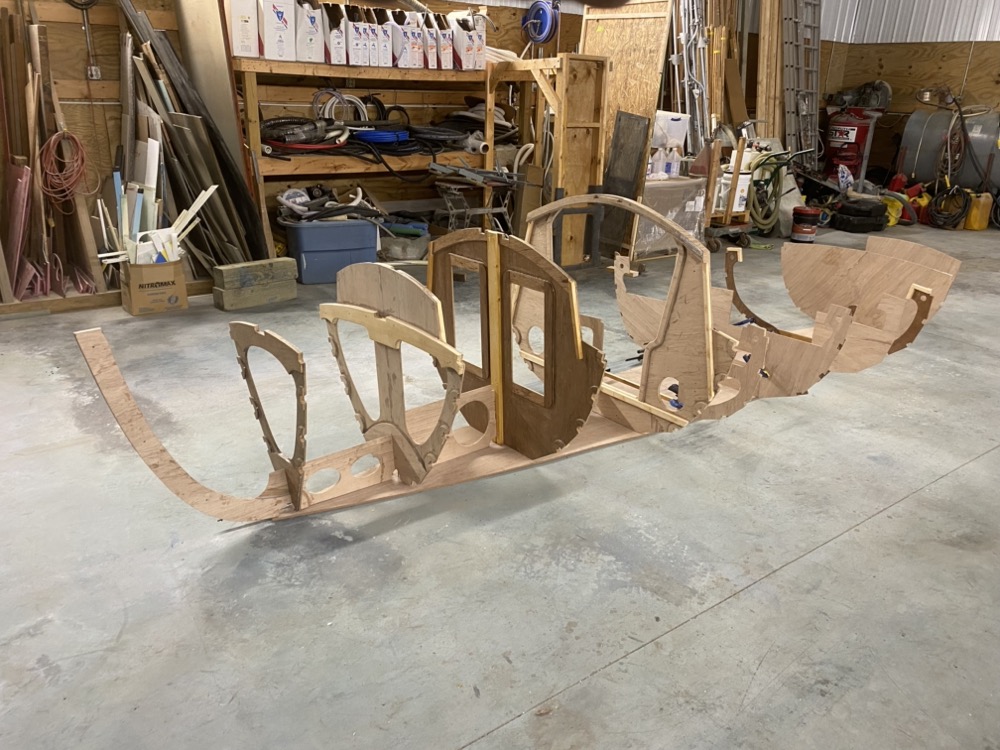
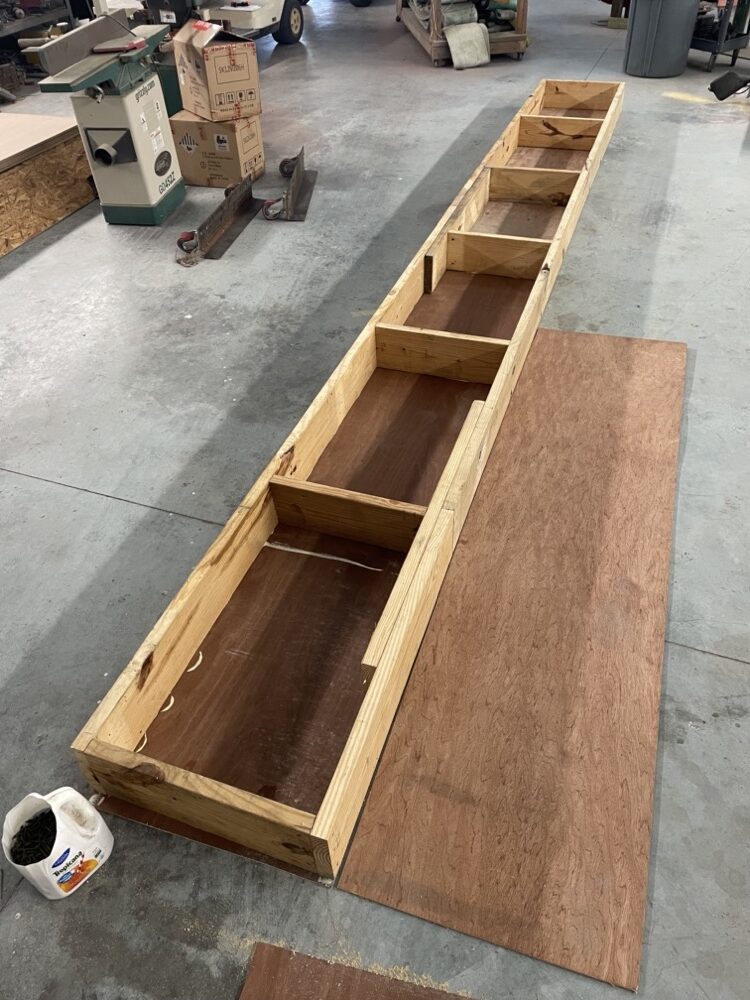
I set up all the frames on the bottom panel and finally got a look at the size which is both bigger and smaller than I imagined. It’s been a little difficult to get a sense of scale working with just a CAD model and metric dimensions. It’s bigger in the sense that while it’s only half a sheet of plywood longer than my First Mate, there’s way more storage space and I’m really going to enjoy the open center aisle for sleeping. It’s also smaller in that it feels like a totally doable project. When I was cutting out endless bulkheads and looking at my giant stack of plywood I really began wondering if I’d bitten off more than I could chew. I’m still quite a ways away from setting up a strong back since I need to get the bulkheads complete, but it was nice to stand there holding an imaginary tiller and thinking about going on adventures next year.

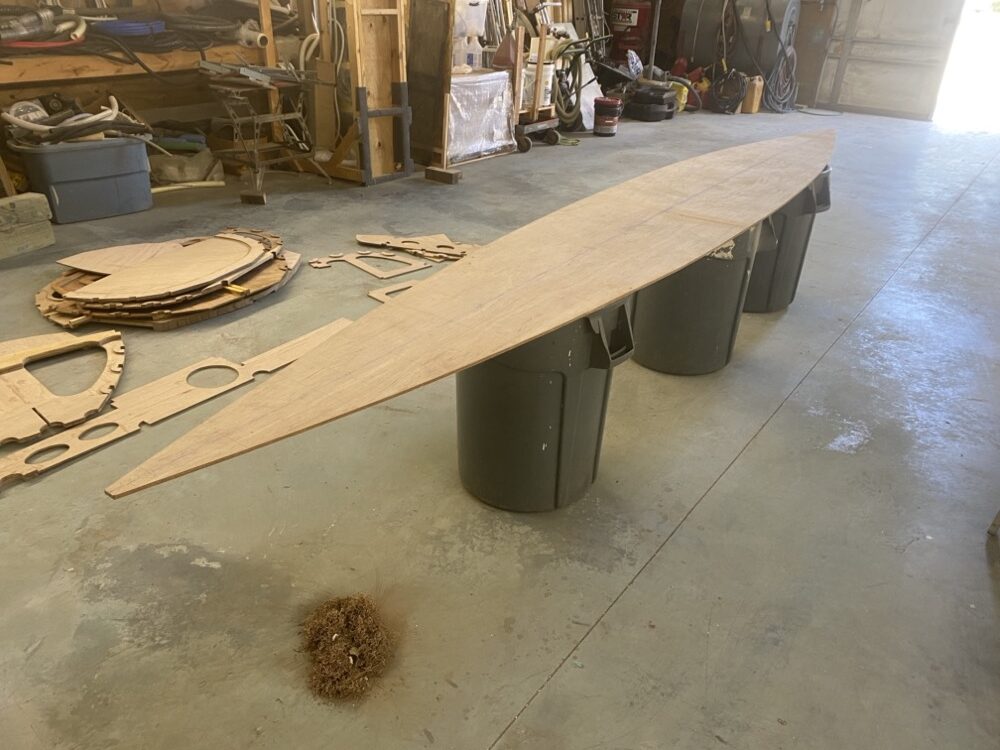
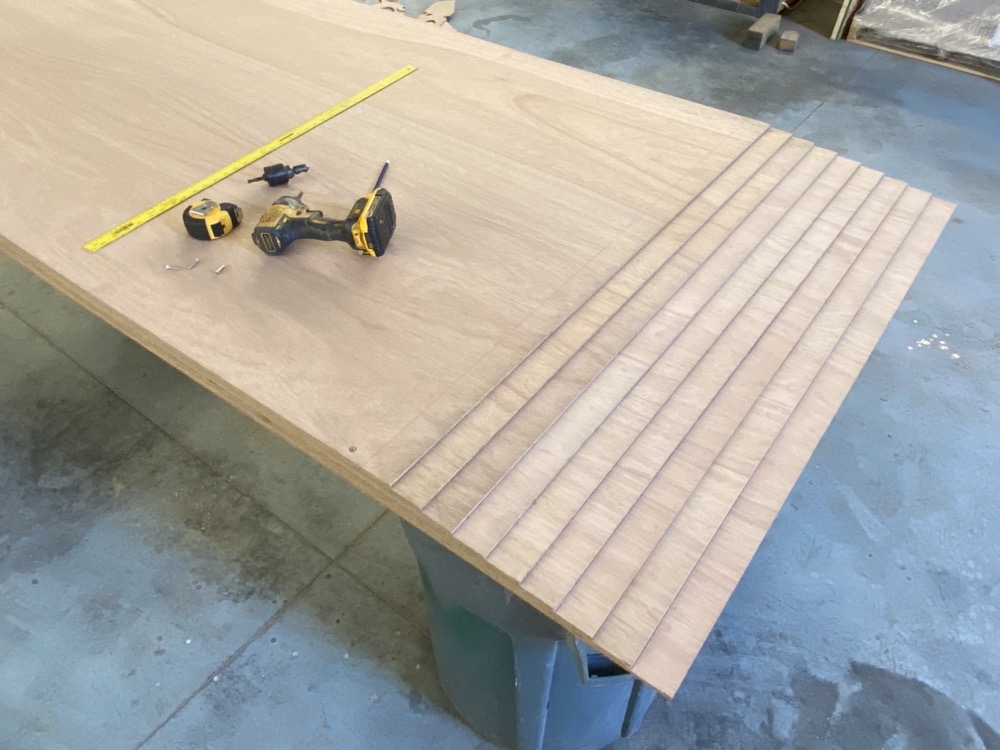
Try as I may there’s just no way to get all eight planks out of six sheets of plywood without doing a bunch of crazy angled scarfs. While I was in the scarfing mode I decided to get nine sheets ready for whenever I get to planking.

I set each sheet back 50mm from the edge and screwed them together in countersunk holes.

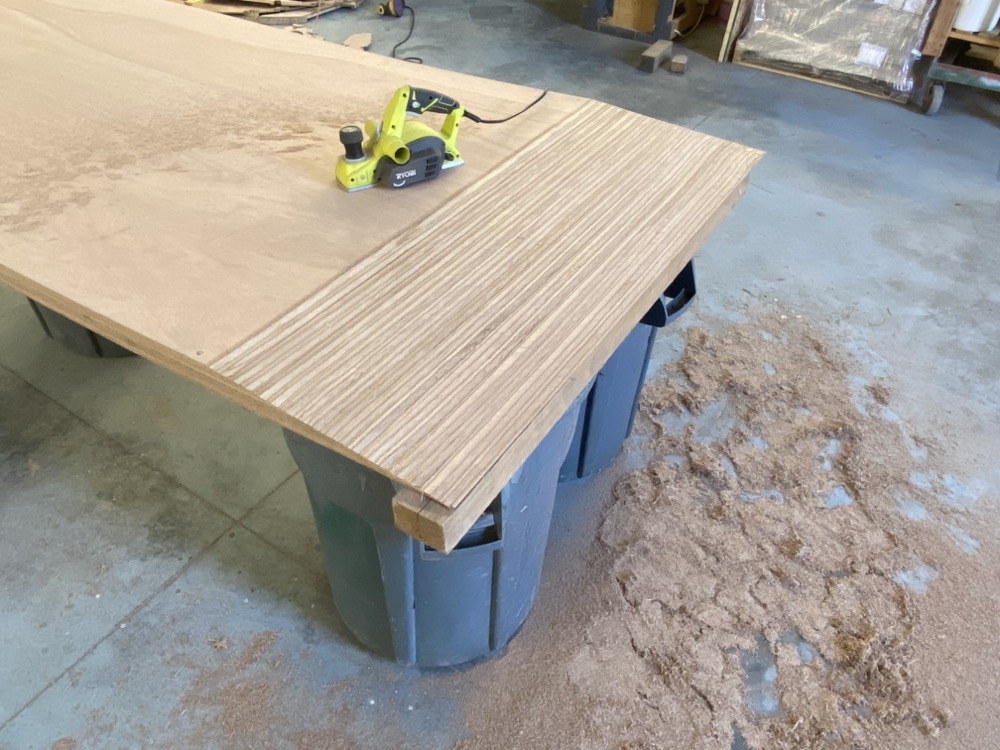
It took about 20 minutes to knock the corners off. I still need to do some hand planing I think up at the top, but it’s pretty good.


Long Steps Build #3

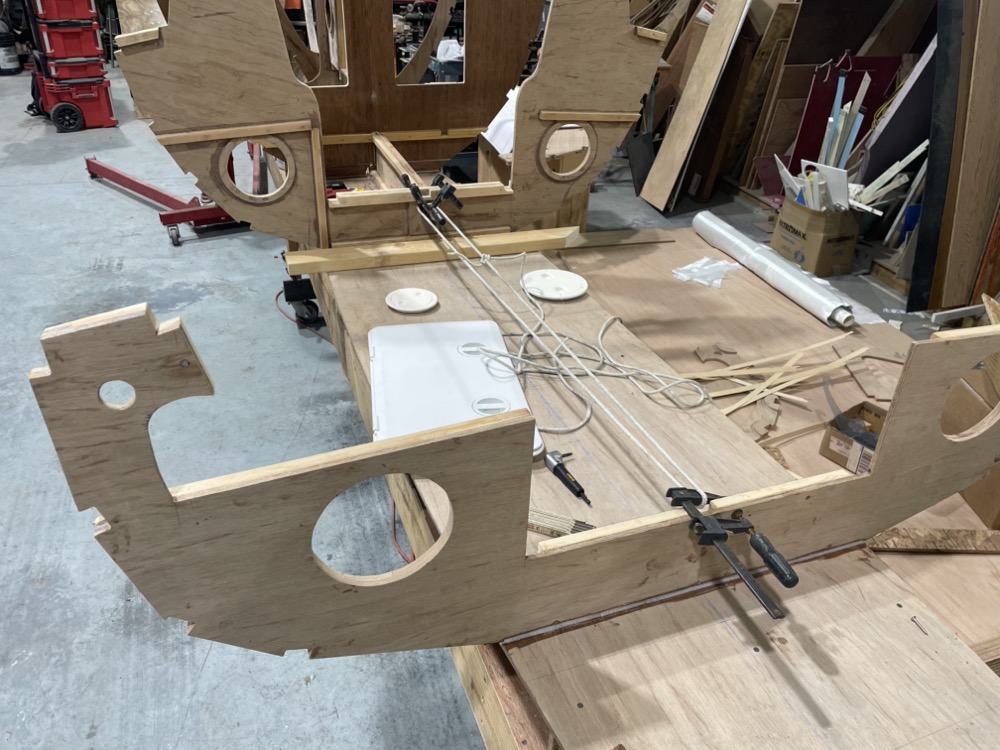
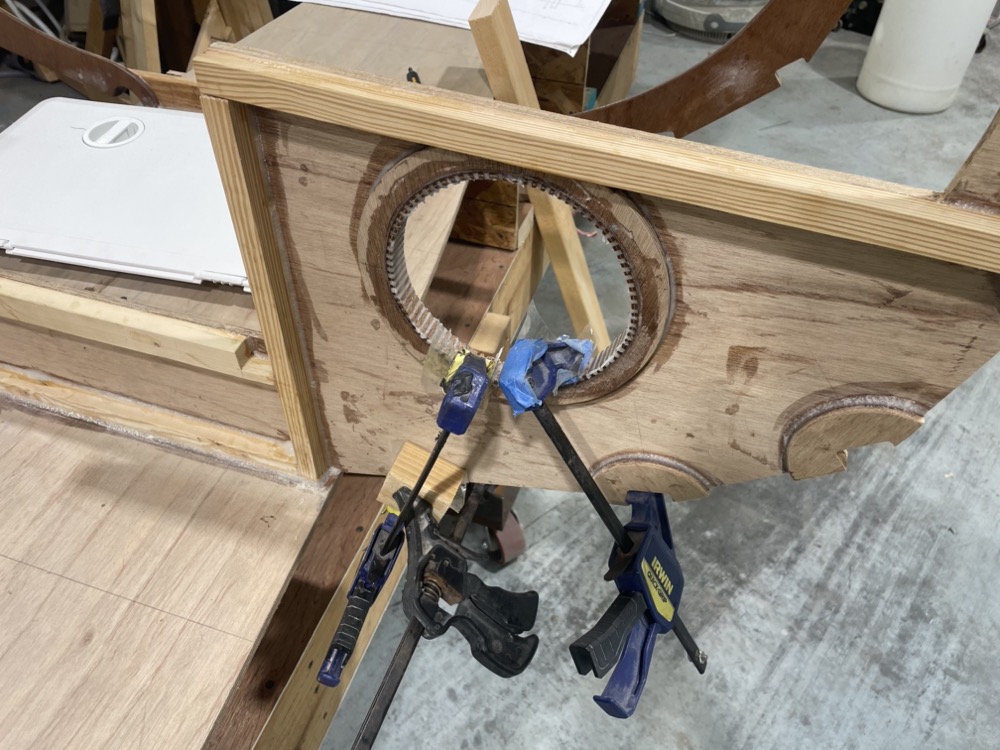
A lot of the bulkheads have doublers where the stringers pass through to give you some more meat to screw into. So I cut out a bunch of circles with a 4″ hole saw and split them down the middle with the bandsaw. It’s been good way to use up the odd shaped offcuts. Then I epoxied them on with a single screw through where the notch gets cut out.

Cutting 70 some odd notches sounds tedious to do by hand and a good way for errors to creep in so I made a jig for a router. I first draw a line perpendicular to the lower strake right at the corner, then align my jig and mark out the notch. I score the line and jigsaw out the waste so there’s less to cut with the router and then clamp down the jig.

My little trim router does pretty well with a 1/4″ bit. When I first made the jig it cut a little deep so I glued a strip of paint stirrer along the fence and redid the notch.

Farther aft the plank angles are more extreme and the jig really sticks out a lot.

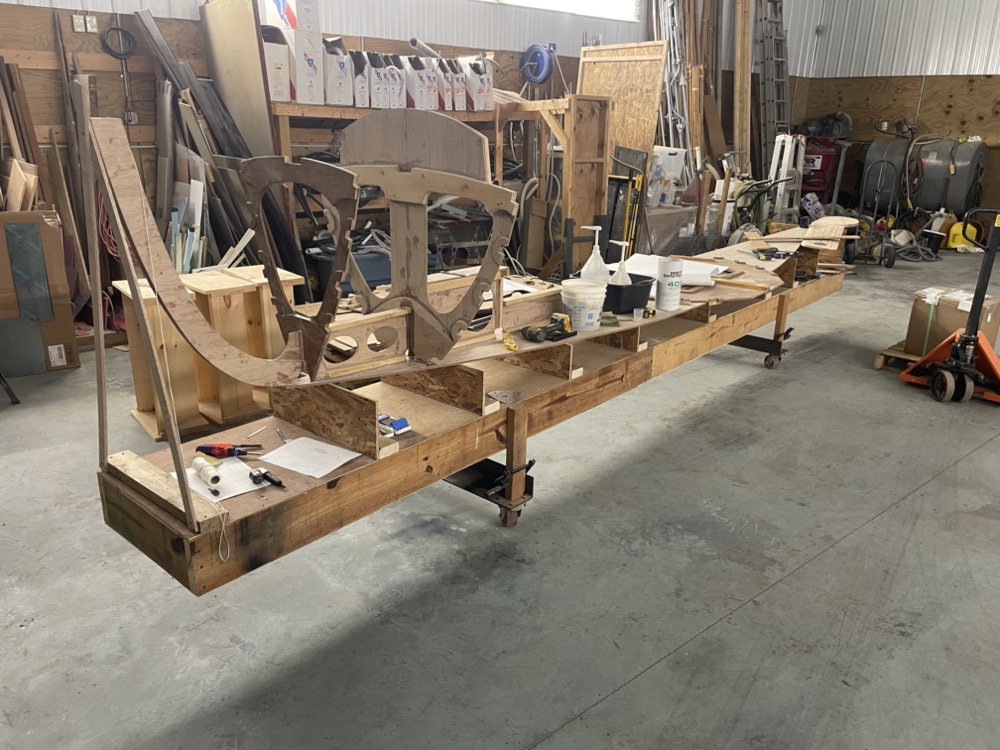
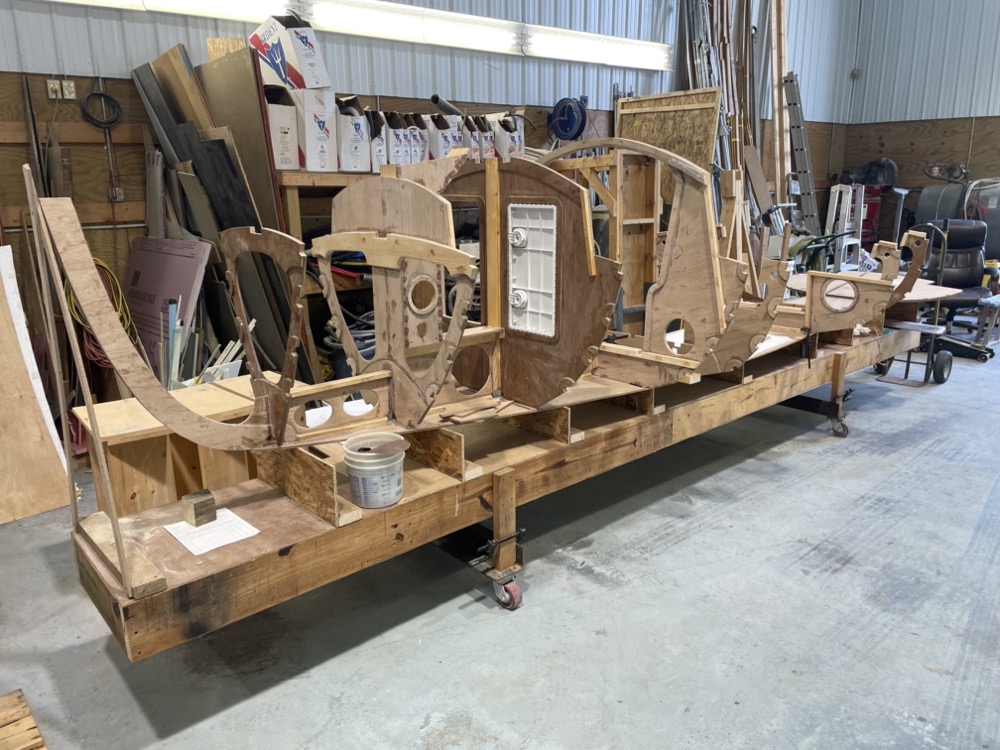
Lately I’ve been putting some of the bulkheads together. I’ve got numbers 1 and 3 just about done while I’m still working on number 8. I drew a centerline on a sheet of plywood and screwed the ribs to it so I could glue on a piece of hardwood. I’m happy to see that the gunnel ended up being less than 1/16″ off of where the plans say it should be. I also tried routing a groove in the access panel for a surgical tubing seal but my jig slipped and I wasn’t happy with how it turned out. So I filled it with thickened epoxy and I’ll try again after making a better jig.

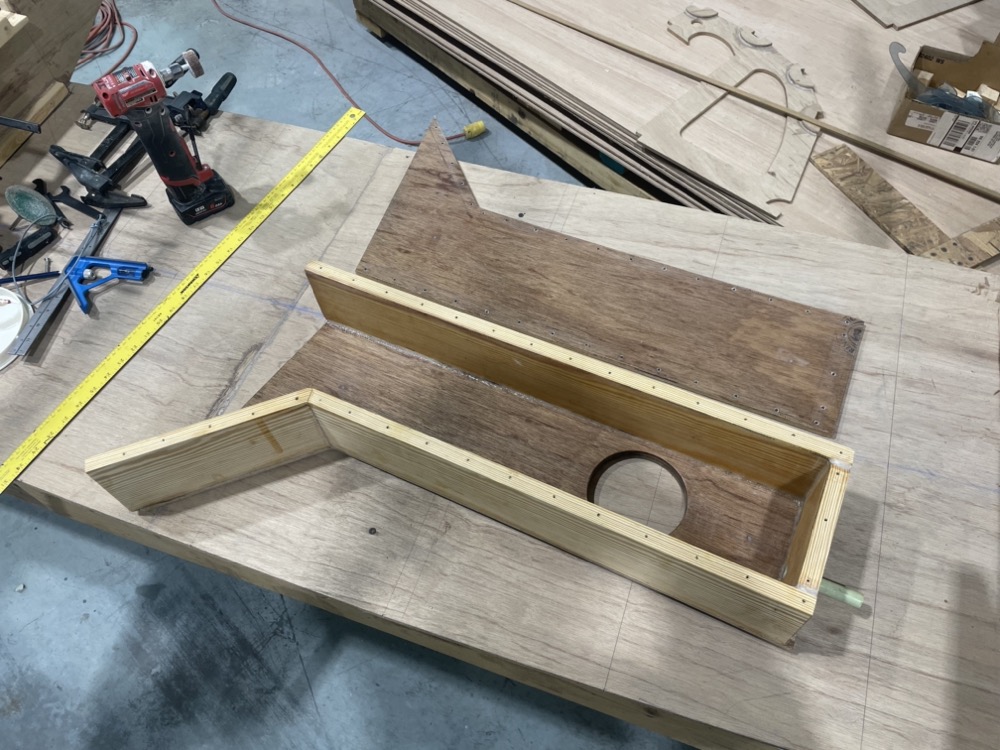
This is the “complanionway” into the little cuddy cabin. The deck beam is laminated from four pieces of 3/8″ ply and I had about 1/2″ of springback after it was glued up and out of the jig. That’s a little more than I expected, so I’m thinking I’ll laminate on another strip and saw it to shape. The missing cleats on the starboard side of the bulkhead is where the off centerboard trunk will go and you can also see the self draining floor with what will become the end of the water ballast tank.

Long Steps Build #2

This week I finished cutting out the third sheet of 3/8″. Scoring the lines with a knife before jigsawing does stop the splintering, but that quickly got old. I’ve started cutting out the parts within 3/8″ or so of the line with a jigsaw, then doing a more precision job at the bandsaw. I’ve had really minimal splintering that way and I can get it accurate enough that just a few swipes with a plane takes things down to the line. I also had time to epoxy the two stiffeners on either side of the stem.

If there are a pair of parts I only draw one and cut that out as accurately as I can. Then I use it as a pattern for the other side and jigsaw that out. A few temporary screws holds the two together so I can run it through my router with a follower bearing. This has worked really well and is an easy way to get things symmetrical.

Like a lot of boatyards, there’s an abandoned Fuji 35 in the corner slowly rotting away. I’m trying to keep costs to a minimum so the boss let me salvage anything off of it I could.

So far I’ve got some 14″, 10″, 6″, and 4″ cleats. Three fairleads, assorted blocks, a tether, and some bronze. I’m toying with the idea of casting a few things for my boat… I’ve wanted to give that a try for a while. Not sure what I’ll do with those big cleats though. Maybe mount one to the mast for the flag halyard?

Long Steps Build #1

I guess it’s official, I’m starting a new build! In 2019 I launched my Ross Lillistone First Mate and I’ve put a bit over 600 miles on her. It’s a great boat, especially single handing or for a pair who know how to sail but lately I think my use case has changed and I want something different. After a ton of research I settled on John Welsford’s Long Steps and in December 2022 I bought the plans. It was a little unnerving since I could only find one or two that had been launched, but I figured if this is what John was designing for himself to circumnavigate the north island of New Zealand it should be good enough for what I have in mind.

Here’s the size difference between my 15′ First Mate and the 19′ Long Steps. I really want to do more camping and Long Steps will be a lot easier to get set up. The open cockpit will be simpler to sleep in and I’m excited to try out the benefits of the mizzen. Last summer I motored out to a sandbar quite a bit with my wife and son and some more room would be nice.

Unloading 21 sheets of Hydrotek plywood. Of course it had to come right as we were getting ready to fiberglass up an old through hull on a boat, hence the gloves. My plan is to build this thing on my lunch hour.

Over the last year I’ve been slowly converting the hand drawn plans to CAD. I then ran the drawings through nesting software and let my computer crunch on it for half a day. It got me a little closer, but it was still better in the end to do it by eye. There’s just so many pieces and I found it easier to use the software on the big ones and then squeeze in everything else. If all goes well I hope to save 1.5 sheets of 3/8″ ply!

A benefit to 3d modeling everything is that I can add the stiffeners to the bulkheads and get a good idea of how things are supposed to fit together. Better to get this figured out digitally than to try figuring it out with a cup of epoxy in hand.

I started with the easiest sheet first and plotted out all the points with a T square made from the shipping crate (the rest will become the strongback). I later sharpied lines every 100mm on the blade to help me gauge where to put the mark. This is my first project in metric and there’s been a bit of a learning curve since I have no feel for how long anything is.

Eventually I got six parts jigsawed out and planed down to the line. I knew meranti was supposed to be pretty splintery and it certainly is with the jigsaw set in orbit mode. Changing to a straight cut helped, but I eventually found cutting downhill to the grain worked the best. Sometimes I plunge cut in the middle of a part to get a more favorable angle.

Piankatank River 2023

October 28th, 2023

I’ve decided to sell the 1971 British Seagull 40 Plus a friend gave me, so I took it out for one last trip. Partially to make some memories since I really haven’t used it all that much, but also to get a video of it running for the listing. I’ve heard the upper end of the Piankatank river is really pretty, so I headed up there on a 22 mile trip to check it out. The reports are true and I’m definitely planning to head back up there at some point!

Friday afternoon I launched at a nearby ramp with my 1.5 year old son to motor back around to our house. It took 9 or 10 pulls to get the motor going, probably because the gas has been sitting around since the beginning of spring. But eventually it roared to life and we puttered off at 5 mph.

Henry had a great time standing there digging Cheerios out of his bowl and watching the scenery go by. I ran a line through the jib cleat to his life jacket so I could reel him in if he tried to climb over the side and stick his hand in the water. That was a favorite move from our summer trips out to the sandbar.

The next morning I set off under perfectly calm conditions. A few times the lower unit collected a wad of leaves or marsh grass and I had to stop to clear it off. I tried to keep an eye on the telltale since the leaves tended to block the water intake, but it was pretty easy to notice when the vibration really picked up. The four blade propeller doesn’t have much going for it to shed weeds.

Heading up the Piankatank. I didn’t know how much gas to bring, so I brought a 5 gallon tank mixed 50:1 as backup. Turns out the 1 gallon and full motor tank was plenty. Originally the Seagull ran on a 10:1 mix but mine is new enough to have better bearings so I changed the carb needle to run 25:1.

About halfway up the river I noticed a sunken barge with a crane on it so I swung over to check it out. It always feels a little eerie when I come across something sticking out of the water that shouldn’t be there.

I motored along enjoying the scenery and farther up the river the woods gave way to a winding marsh of phragmites. From what I understand these are pretty invasive and outcompete the natural marsh grasses.

Along the bank in places were patches of cypress trees with dozens of knees sticking up out of the water. My father was a pretty serious hobby wood carver and I have a few gnome faces he made out of them.

In the last couple miles it really started getting beautiful. I saw some bald eagles flying around and perhaps that was their nest.

Perfectly blue skies and still water as I hunted for the next stretch of river.

Farther up the river shrank down to about 50′ wide.

This was about as far as I dared to go and there was just barely enough room to pole my 15′ boat around with an oar. I later found I missed a turn and could have gone at least another mile on a different branch up into the Dragon Swamp. Next time!

Idling back down the river watching the ripples make wild reflections. I usually lock the motor straight ahead and steer with the tiller but it has an annoying tendency to slowly vibrate itself over no matter how tight the shaft clamp is.

What a beautiful day and not a cloud in the sky.

Eventually I made it back to the Deep Point boat ramp where my wife and son were waiting. Up until the early 1900’s steamboats carrying passengers and cargo made it this far up the river as they connected lots of little towns all over the Chesapeake Bay.

After cleaning up the motor I put it on Marketplace for $250. I figured the price was on the optimistic side so I decided to model some different propeller shapes to 3d print and experiment with while I waited. But lo and behold I had a buyer within a few days who wanted to pay me $260! At the drop off he said he restores old outboards and displays them at outboard motor meetups. I’ve never heard of such a hobby, but more power to him! It’s probably the best use for it.

After looking at the GPS data I found my average cruising speed was 5 mph and I went right at 10 miles on a tank of gas. Apparently the tank holds 0.6 gallons so that works out to about a cup of fuel per mile, or 16.7 mpg. Time wise, it ended up being about 0.3 gph.

Labor Day 2023

On Labor Day we took Moga back out to the sandbar at Gwynn’s Island. There were quite a few boats, although not as many as last time.

I think Henry enjoys sitting in the boat wiggling the tiller back and forth more than he likes the beach. Another favorite pastime is climbing forward and getting the excess anchor and dock line all tangled together around the belaying pins on the mast partner.

He did have a great time playing in the water though. He’s pretty fearless which makes it difficult to do anything but keep an eye on him. The first time we introduced him to water at a lake he just started walking out and would have kept on going if we didn’t stop him once the water was up to his torso.

Around midday I noticed a Coast Guard MH-60 Jayhawk doing laps in the Bay off the side of Gwynn’s Island. After a while it started doing long back and forth runs up past Stingray Point. I assumed they were looking for someone, or possibly doing a training exercise.

Here’s the track from a flight tracker. The sandbar we’re at is between the two most southerly runs.

Eventually I learned someone found a floating life jacket and the helicopter came all the way up from Elizabeth City, North Carolina. It’s both insane and comforting to know the Coast Guard will spend thousands of dollars an hour flying around just to investigate a life jacket that had in all likelihood been blown out of a boat.

Heading back after a long day. Every crab pot buoy we passed Henry would point and was sure it was a “baaaallll!”

Going out the trolling motor consumed 151 wh over 2.62 miles for an average of 57.6 wh per mile at an average speed of 3.5 mph. On the return trip it consumed 177 wh for an average of 67.6 wh per mile at an average speed of 3.7 mph.


Gwynn’s Island

Friday night on a bit of a whim my wife and I decided to take the boat around to the sandy beach below Gwynn’s Island for the day. We got launched around 11:30 am and Henry had an absolute blast in the boat. The last time we took him out all he did was scream and try to climb overboard! Once we got there the beach was packed with probably a good 30 boats at times and it was fun to compare and contrast the $50,000 and 310hp boat that pulled up and anchored beside me. Henry had a great time splashing around in the edge of the water, we caught some moon jellies, saw a fiddler crab, and made a friend with Palmer who wanted to play with his beach toys. My trolling motor setup consumed 272 Wh over the 5.3 mile trip for an average of 51.3 Wh per mile which matches nicely with my estimate of 50 Wh per mile from the motor testing.

Headed out to the sandbar. We had coolers, beach chairs, two tents, toys, and who knows what else! Everything with a kid takes twice as long and twice as much stuff as you’d think.

Tucked up by the beach. Recently I melted 6.5 pounds of lead into the stock on my three piece fisherman anchor and capped the ends. It really sets firmly and the lead replaces the need for chain which at this scale wouldn’t weigh enough to do much of anything but chew up the finish on the boat.

I tied a stern line to the beach umbrella to pull the boat close to shore and Henry had a great time swinging the rudder back and forth.

Helping me steer on the way home. I told him all about how starboard and port came to be and how daymarks are red triangles or green squares. Not sure much of it stuck though.